Flows: Administration Lead Fields
With lead fields you can create and edit a maximum of 200 custom lead fields.
Navigation page
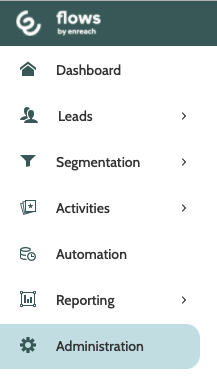
To access lead fields, click Administration in the side menu.
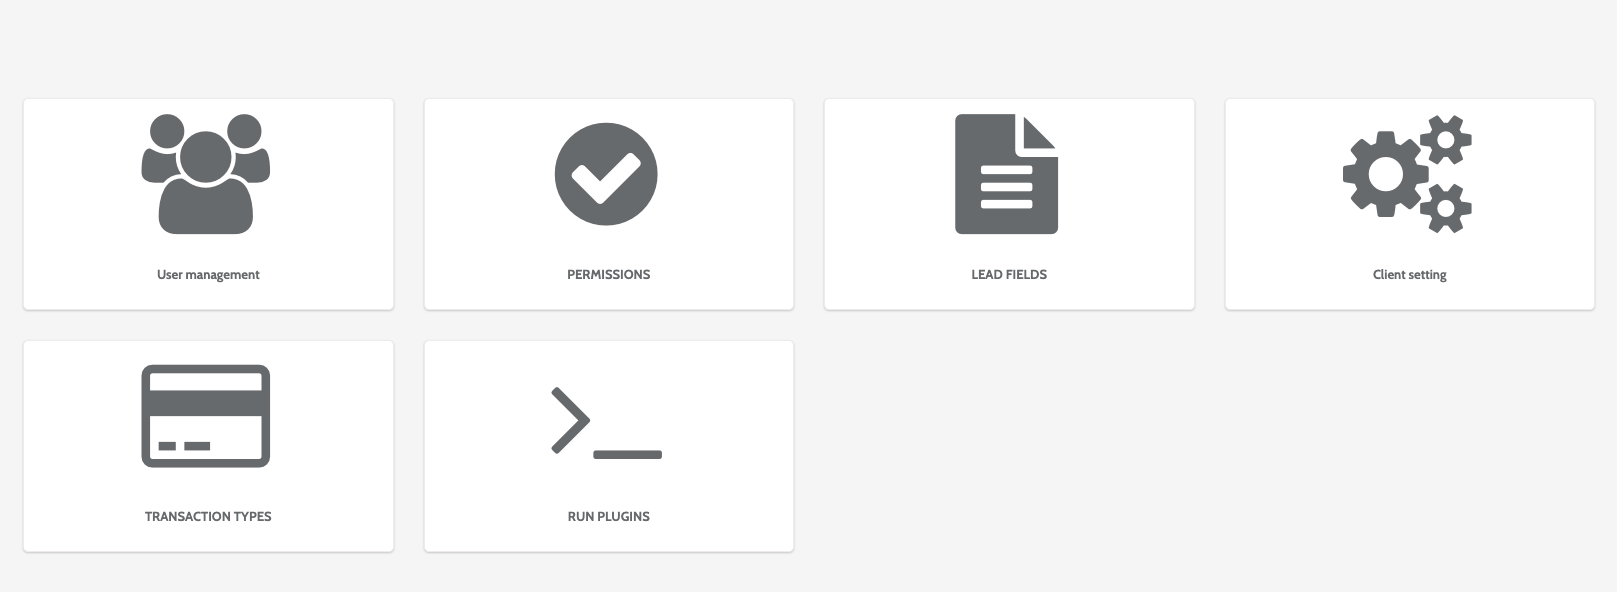
In the Administration home page, click Lead fields.
In the navigation page, you can view existing custom lead fields in Flows, including the Field header, Field group, and Field type.
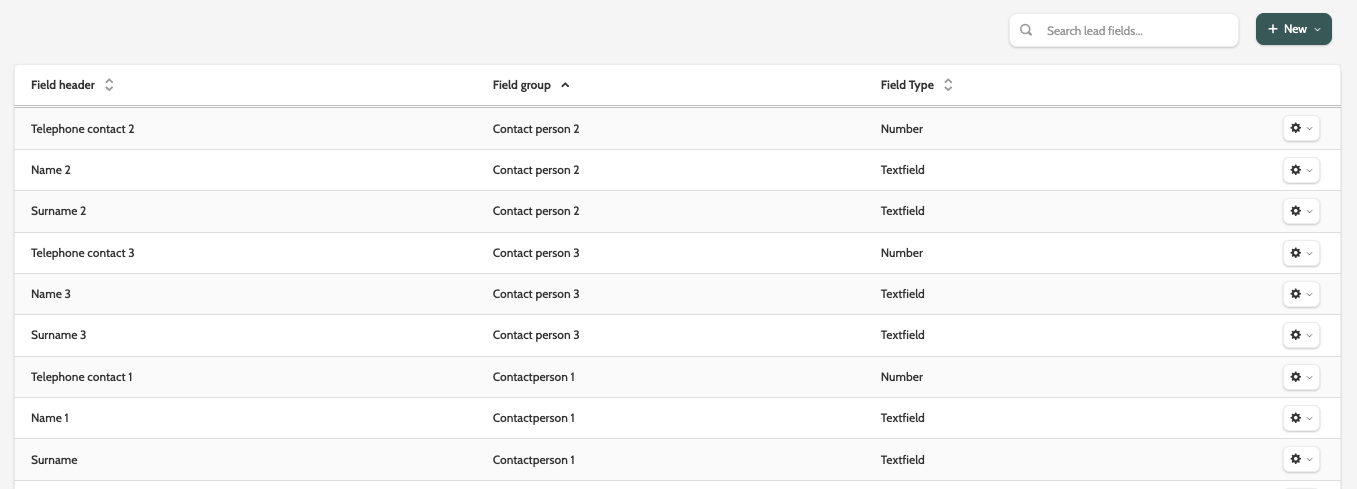
To work with an existing lead field, click the cog to the right, and click Edit or Delete.
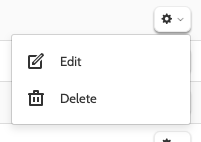
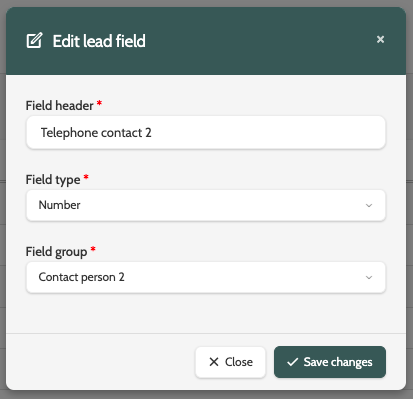
Click Edit to edit the lead field in a pop-up window.
Change the Field header, Field type, or move the Lead field to a different field group.
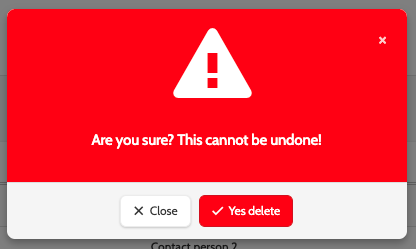
If you want to delete a lead field, you will be asked to confirm first, as deleted lead fields cannot be recovered.
Create a new lead field
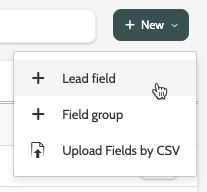
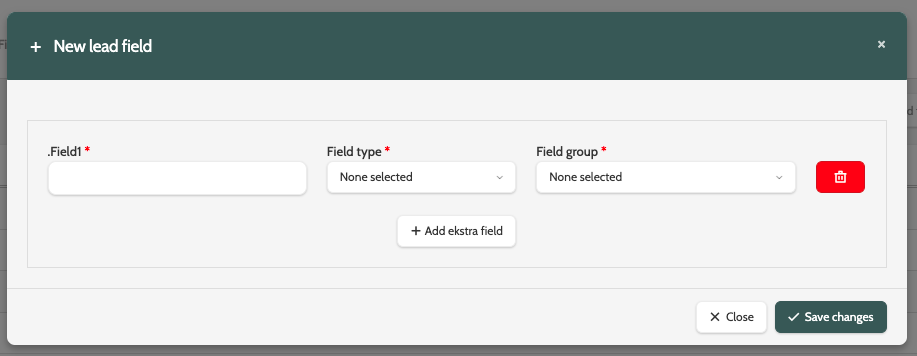
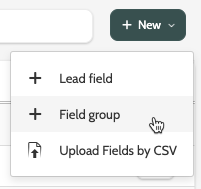
To create a new lead field, expand + New in the navigation page and click lead field.
Please note that to create a new lead field, you must have first created a Field Group. Additionally, each lead field can contain a maximum of 8000 characters, including whitespaces.
In the pop-up window, enter the following information:
- Field1: enter a name for your new lead field
- Field Type: under Field type, choose between Textfield, Number, Datetime, and Hidden
- Field Group: expand the menu and choose which Field group the Lead field should belong to.
Click + Add extra field to add more lead fields, or click the red bin icon to delete a lead field.
Click Save changes to save your lead field.
Create a new field group
To create a new Field group, expand + New in the navigation page and click Field group.
In the pop-up window, enter a name for your field group, and click Add to list. 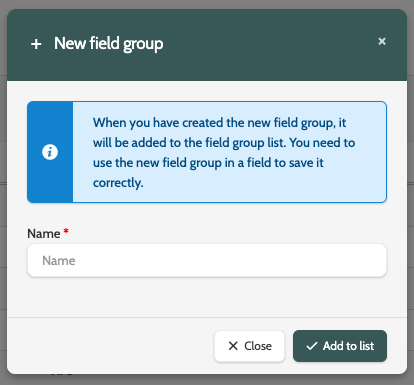
Upload fields by .CSV
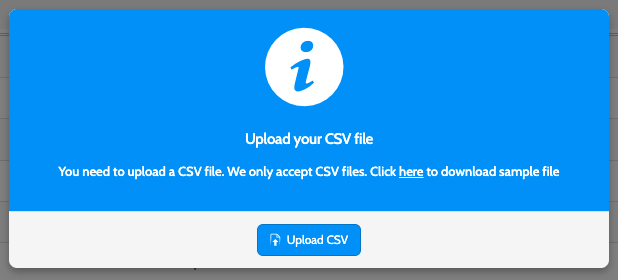
To upload a new lead field from a .CSV file, expand + New in the navigation page and click Upload Fields by .CSV.
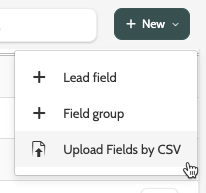
In the pop-up window, click Upload .CSV to upload a .CSV file from your desktop.
Alternatively, you can download and use the sample file as a guide.