Leads: Quality Assurance
With Quality Assurance, you can perform quality checks on your agent's interactions with leads, listen to call recordings and view call and lead details, and approve or reject the call.
What is Quality Assurance?
If you are an admin user in Outbound, you may need to conduct quality assurance checks to make sure that your agents are conforming to company guidelines, and to validate agent's interactions with leads.
Quality Assurance is a versatile feature that enables you to both monitor and evaluate your organisations' communications. Quality Assurance is all about providing service to your customers at the highest level possible.
What can I use it for?
If your organisation is based in Sweden, you will already know that in order to create a contract, a verbal agreement is not enough.
Instead, you need a written copy of the contract, and most likely an audio recording of the lead saying 'yes', in order for the contract to be legally valid. With Quality Assurance, you can review the audio recording of the conversation, view the signed contract, and mark the activity as Approved or Rejected.
An Example Lead LifeCycle using Quality Assurance
With Quality Assurance you can check the quality of deals made or meetings booked. The details of the Success, including call recordings and lead data, is presented to the admin who can then either approve or reject the success. Furthermore, you can select exactly what should happen to the lead status on approval and rejection
Let's take a look at some example flows using Quality Assurance:
- An agent closes a deal with a lead and sends an SMS order confirmation that the lead then signs.
To verify the order, an admin user listens to the call recording, and checks the order confirmation to see that the lead approved.
When everything has been checked, the admin then marks the call as approved.
- In another instance, when the admin listens to the call recording, they realise that the agent didn’t obtain some important information from the lead.
The admin rejects the call, and the status is set to follow-up redial. As they do this, they click edit, and add some helpful notes in the lead’s information. When the agent follows up with the lead, they will know exactly what information they need to get.

Navigation Page
Quality Assurance can be found under the Leads menu.

In the navigation you can view all leads that have been sent to Quality Assurance, including the campaign they came from, the status, and the main result.
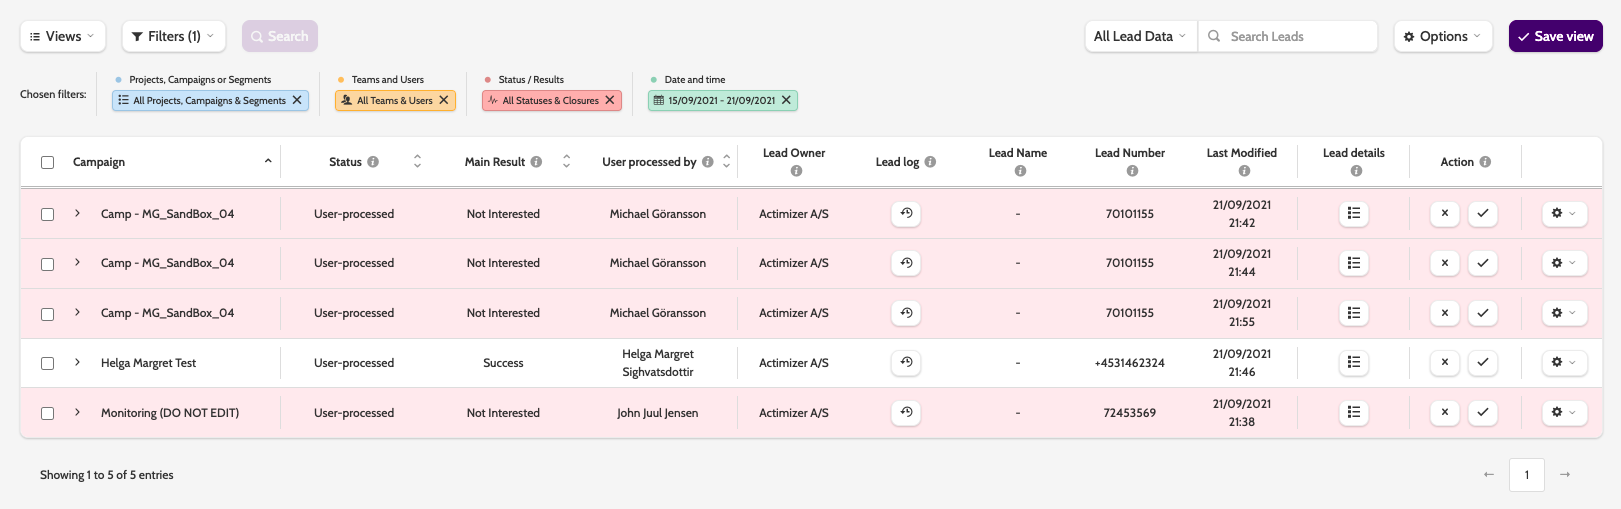
In the top bar you can select or create a new filter.

Saved filters can be found in the Filters menu.
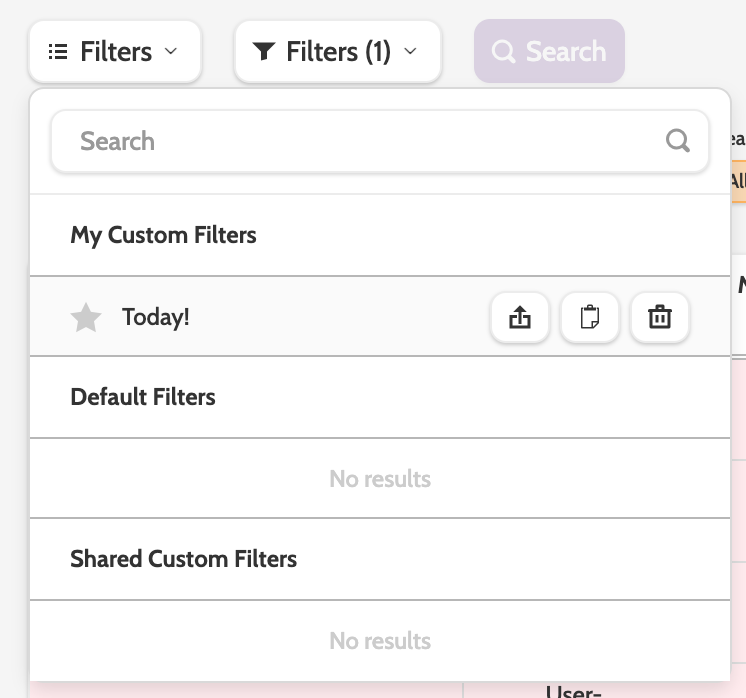
Click Filters to customise the view.
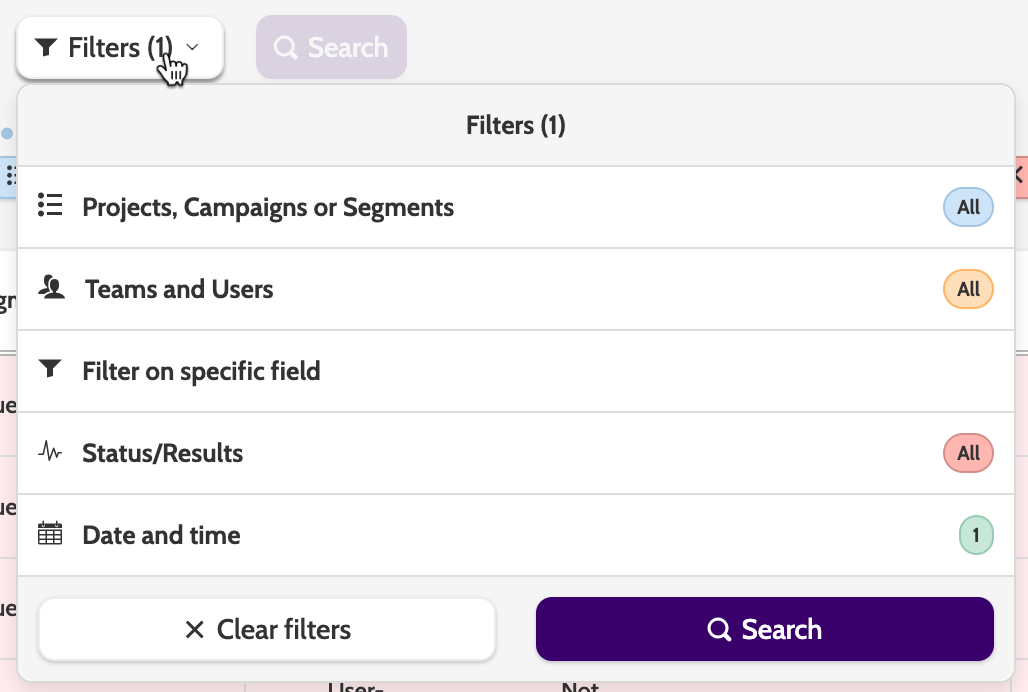
Or the smaller filters below.

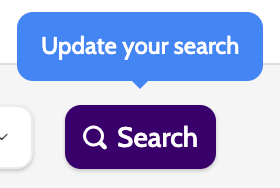
Click Search to apply the filters.
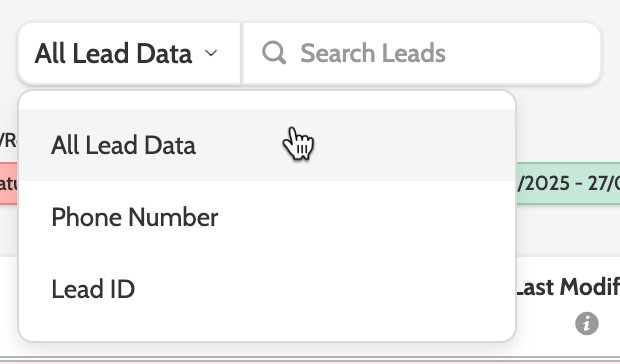
You can also look for a specific lead using the search function.
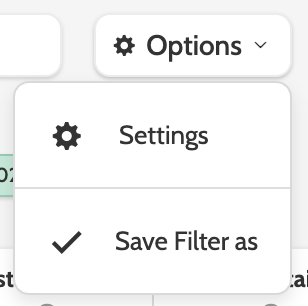
Expand the Options menu and choose between Settings and Save Filter as.
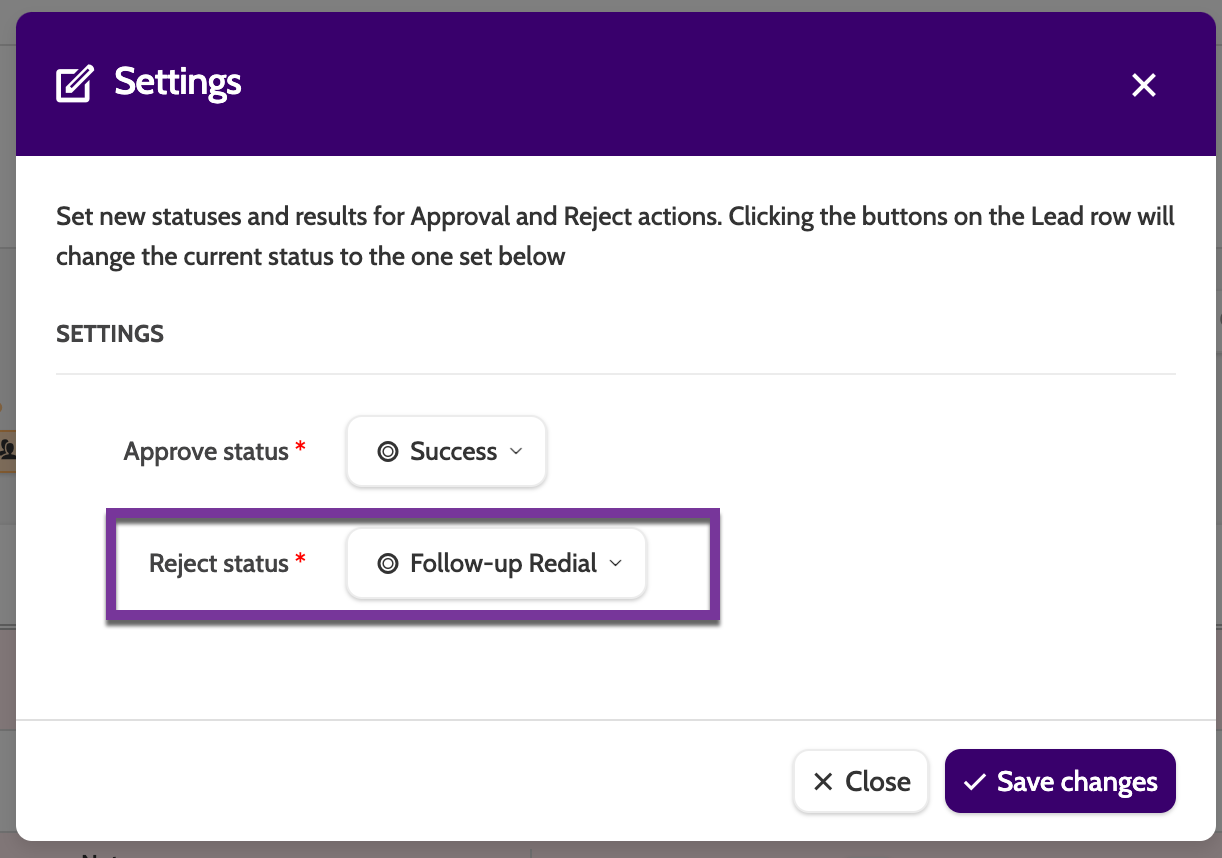
In Settings, configure which Status or Result the Lead will be given once they have been approved or rejected.
- If a lead is approved, the approve status could be set to Success
- If a lead is rejected, for example if a signature is missing on a PDF Contract, the reject status could be set to Pending Validation.

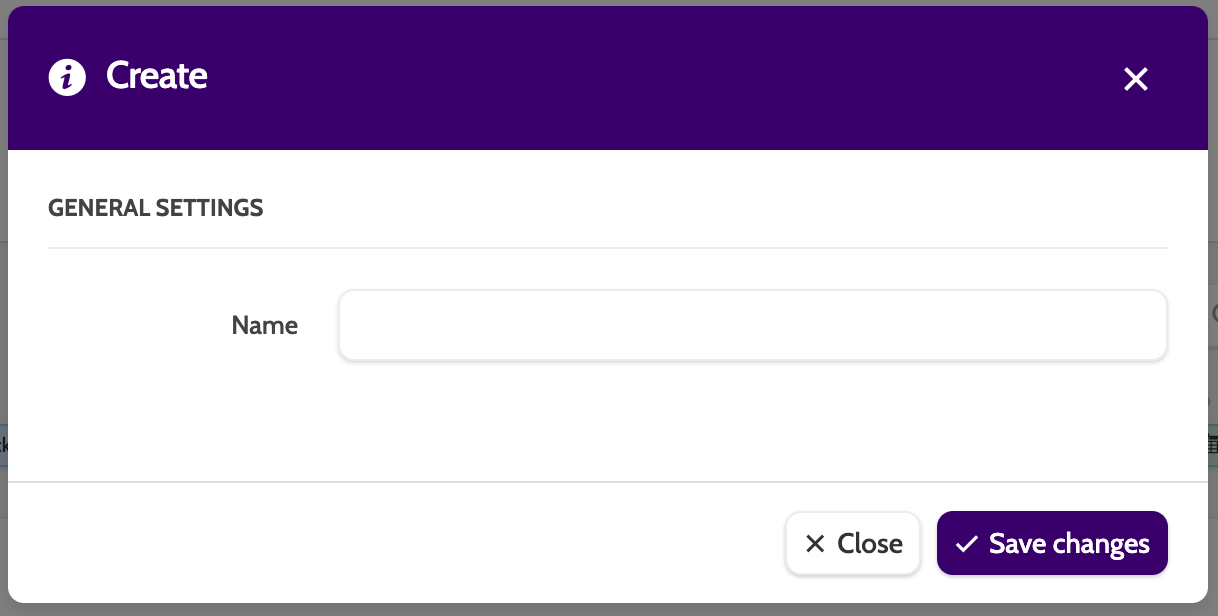
Under Save Filter as, you can save the combination of filters, which can then be accessed from the Filters menu.
Working with calls
To begin working with calls in Quality Assurance, first locate the call.
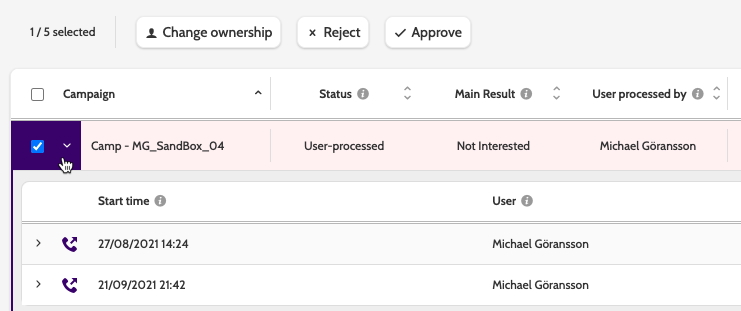
In the top bar you can see all of the available information, such as the campaign it is located in, the status, and the main result.

Click on a call to listen to the call recording.

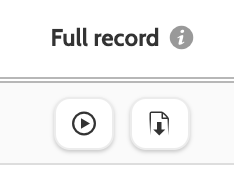
Under Full record, click the play icon to begin playing the recording, or the arrow to download an mp3 of the recording to your desktop.
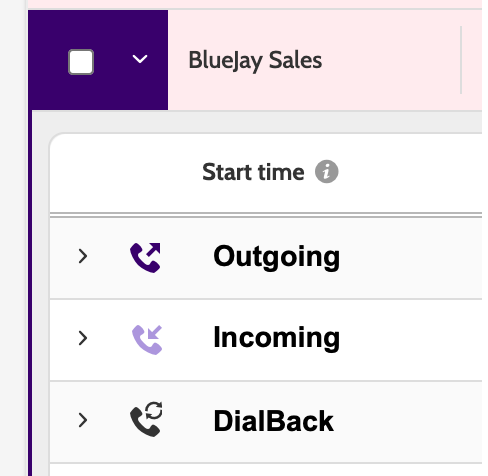
Each call can be identified as Outgoing, Incoming, or a DialBack by the icon.
To work with a call, check the box or boxes of the call to and select an option from the menu.
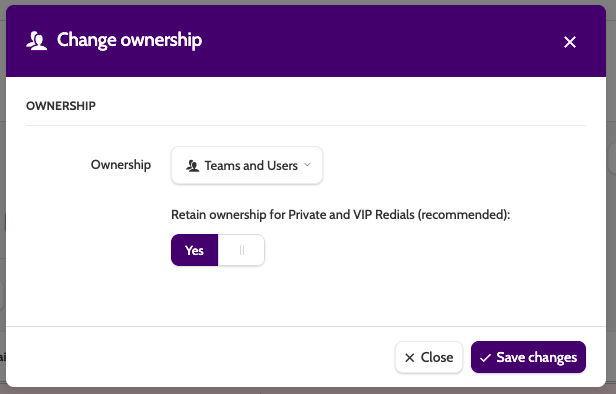
Choose between Change ownership, Reject, or Approve.
Clicking Approve will change the lead status to what was configured in Settings > Approve status.
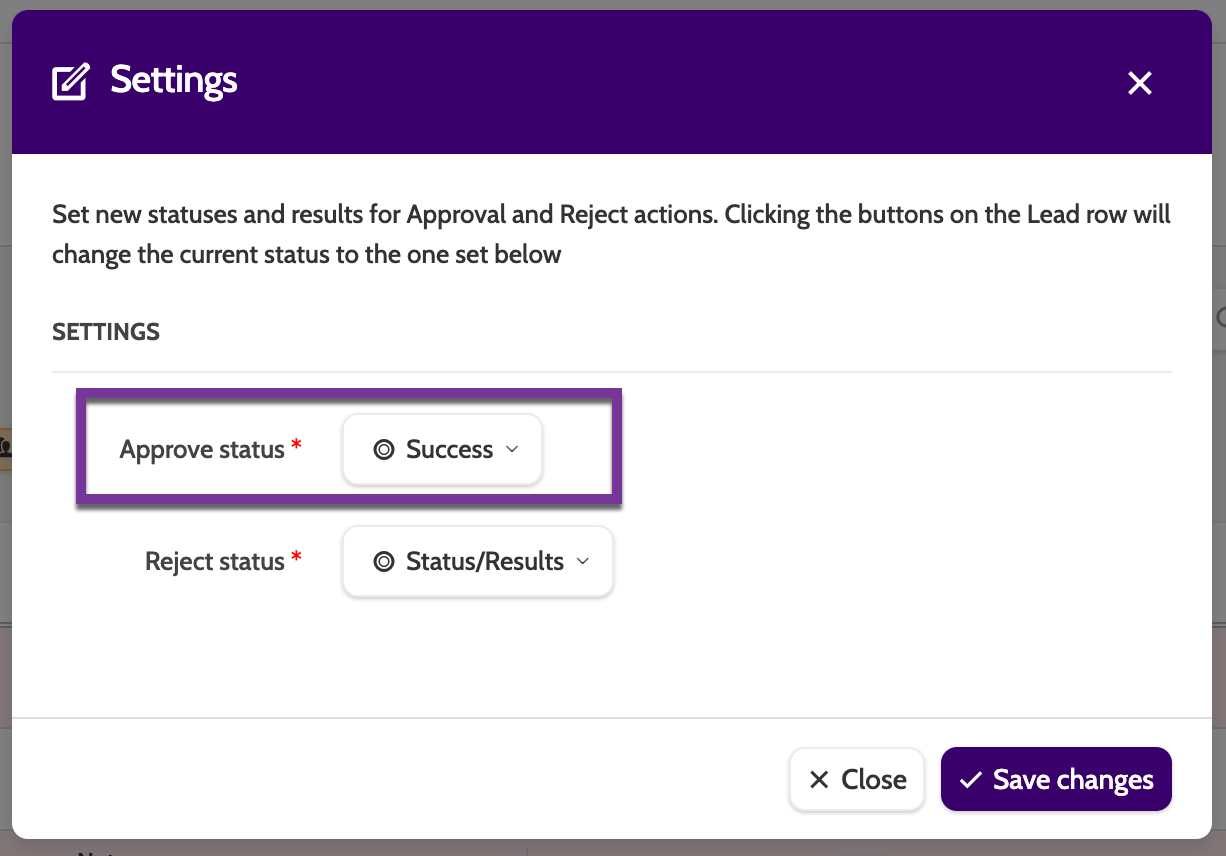
If the lead does not pass the quality assurance process, clicking Reject will change the status to what was configured in Settings > Reject Status.
Under Change ownership, change the lead owner to a team or an individual user.
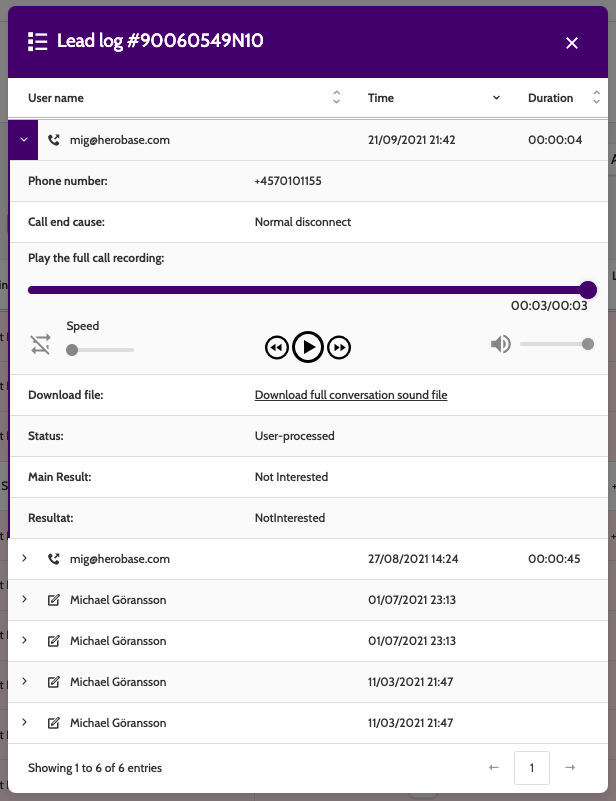
Open the Lead log and expand an entry to view the call or edit details. Here you can listen to the call, download the sound file, and view all the call statistics.
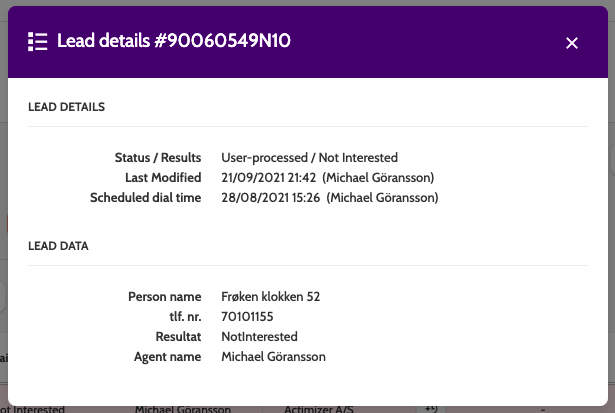
Click the menu under Lead details to open the lead details and data for the call.
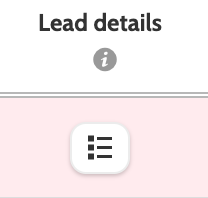
Under Lead details you can view all the Lead Details and Data.
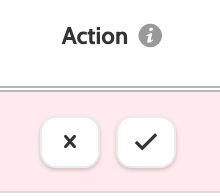
If you need to designate a call as a specific approve or reject status, click the icons under Action.
Click the cog to expand the editing options.
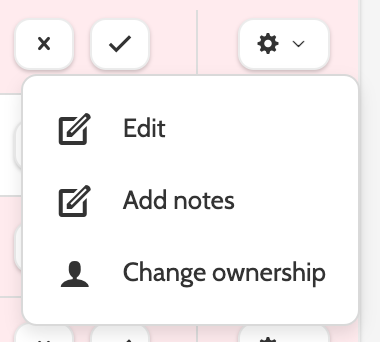
Edit will take you to the contact page, where you can edit the lead data directly.
Click Add notes to add a note to the lead data, displayed on the contact page.
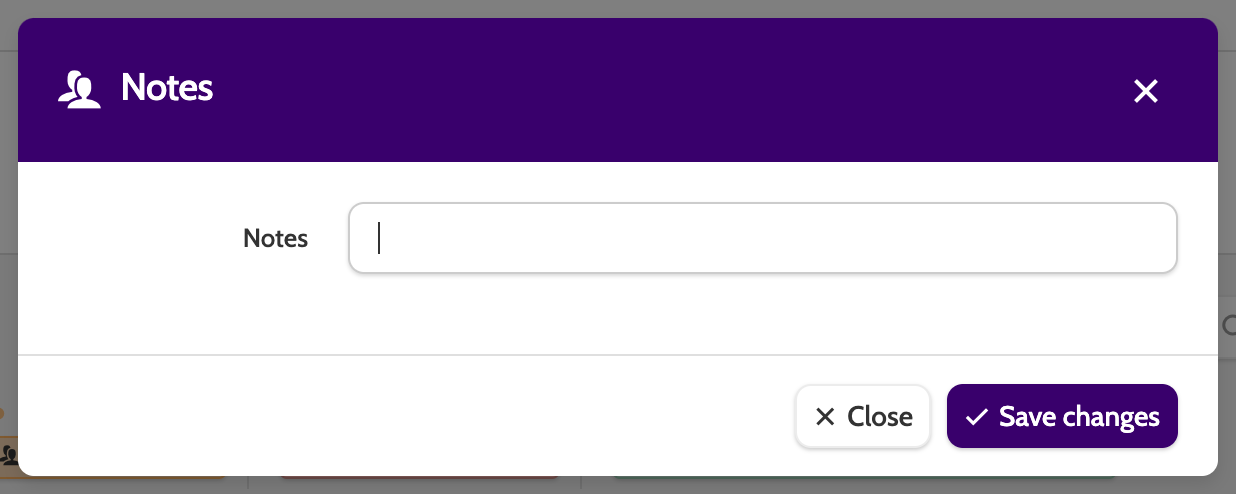
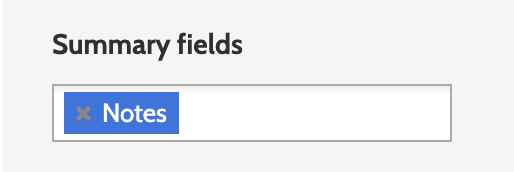
To use Notes, you need to have a field in your campaign template with a Notes Summary field: