Incoming: Incoming Configuration
If you are an admin user, you can configure your incoming queue settings and manage your numbers in Incoming Configuration.
New incoming phone numbers can be ordered through the Caller IDs page.
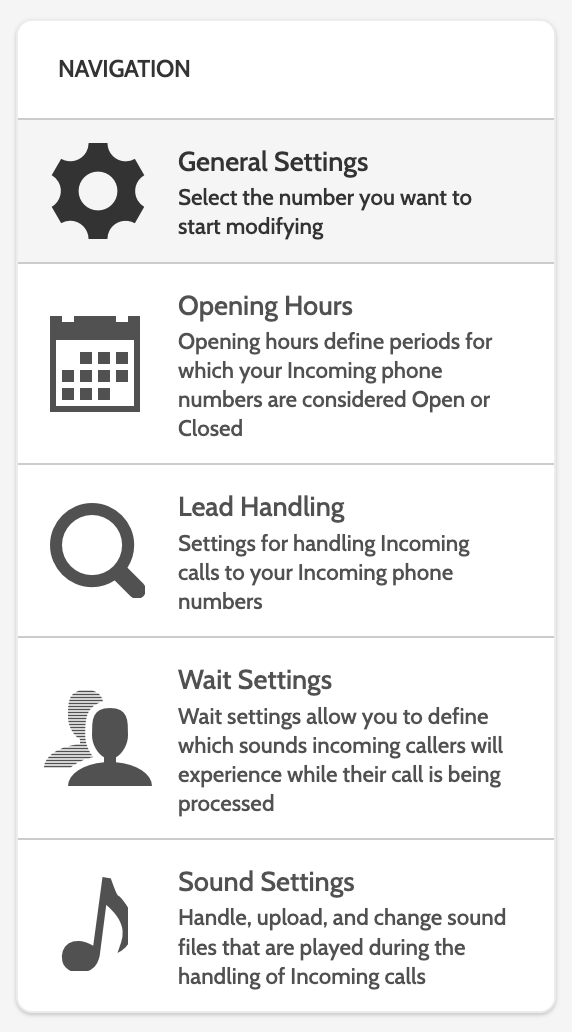
Navigation
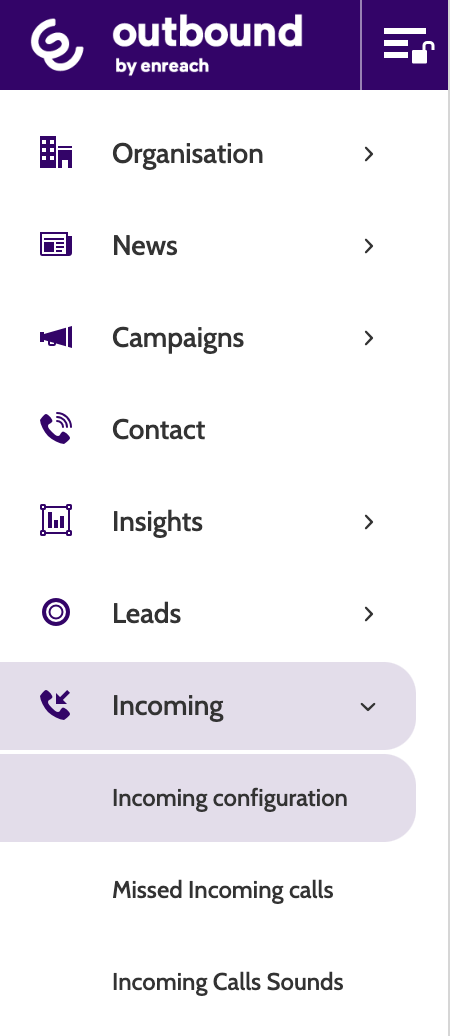
Incoming Configuration can be found under the Incoming menu.
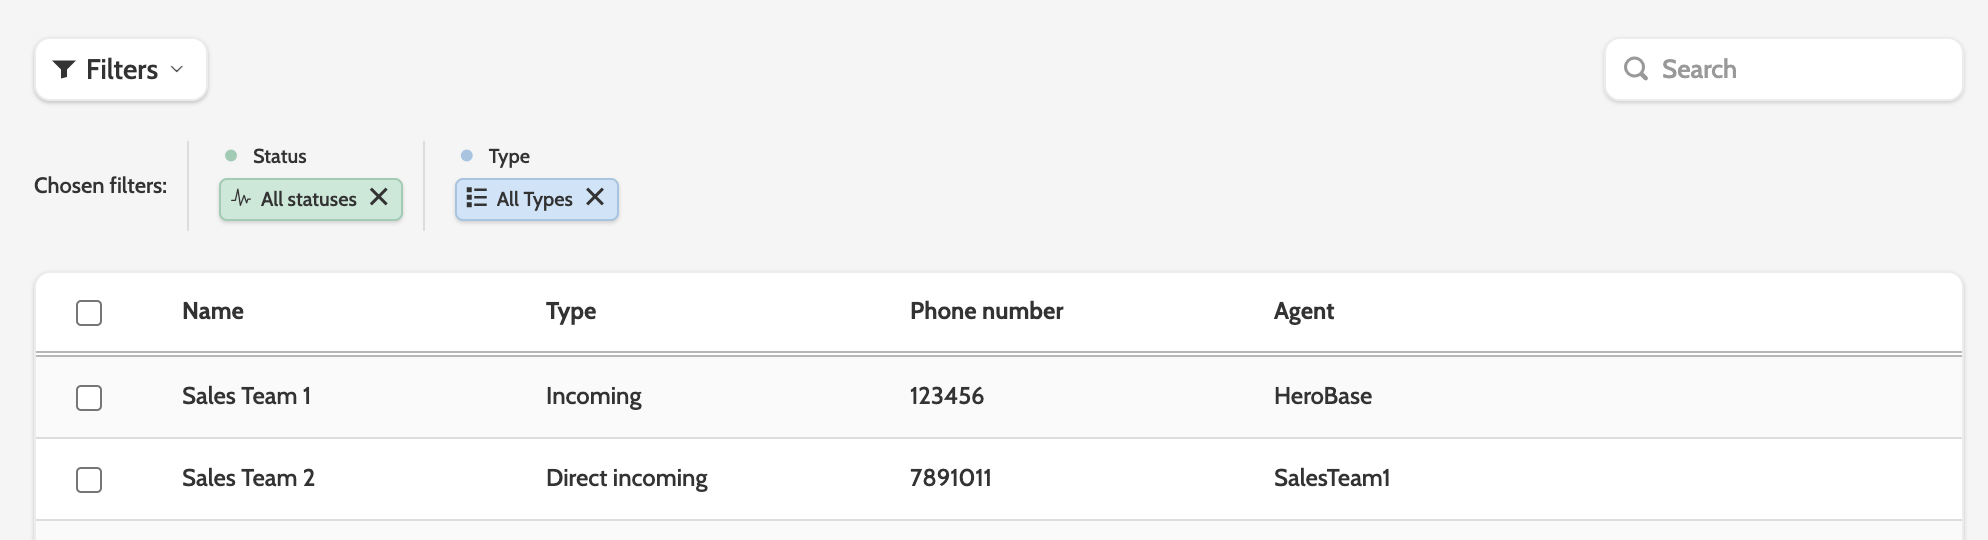
In the Navigation, you will see a list of all the incoming phone numbers in your organisation.
Double click on a phone number to be taken to the editing wizard.
Click a heading in the navigation to jump to that section of the wizard, or scroll through to configure all the settings.
Setting up a call queue
Types of numbers
There are two types of numbers you can use when working with incoming calls: Incoming and Direct Incoming.
A standard incoming number will allow you team to receive calls placed to that number.
Direct incoming numbers are a type of number that you can tie directly to a specific team or agent. These numbers are ordered directly from Outbound support, and are great for ensuring your incoming calls are going to only the right people.
Configuring a direct incoming number is exactly the same as an incoming number, but with the added step of Bind to Team or Agent.

Note that when a direct incoming number is bound to a team, each member of that team will be able to view missed calls to that number in Missed Incoming Calls.
How is an incoming call matched with an agent?
When an incoming call arrives. the dialer checks whether any eligable agent is present: an agent with an open agent line, the right lead ownership code, and the correct campaign access.
- No eligible agent present: the call is rejected immediately and recorded as NoAgentAvailable. It never enters the waiting queue.
- Eligible agents present: the call is queued, the welcome message plays, and afterwards the incoming call pop-up is broadcast to all eligible agents. From there:
- an agent accepts → Connected
- the caller gives up first → CallerHungUp
- the configured queue time expires → Timeout .
Incoming calls and lead ownership
By default, incoming calls 'belong' to all agents, and in most cases are eligable to be offered to any eligable agents.
The exception to this rule are if:
- The lead is a private or VIP redial
- The lead exists in the system with a lead owner
- The lead is calling to a Direct Incoming Number, which is bound to a team or an agent.
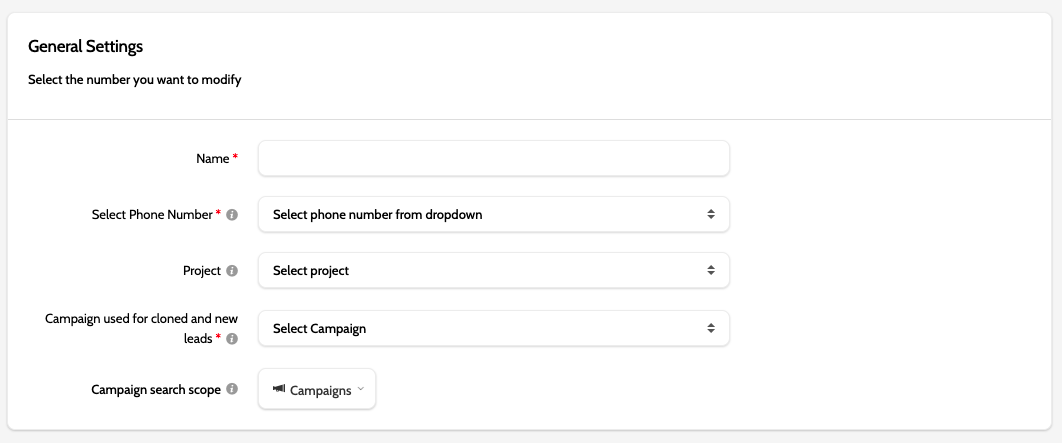
General Settings
Under General Settings, configure the following settings (mandatory fields are marked with a red asterisk):
- Name: the name of the Incoming phone number
- Select phone number: If you are creating a new incoming phone number, select it from the list. If you need more numbers, please contact support
- Project: select which project the incoming phone number will be used for
- Campaign used for cloned and new leads: if you choose to clone or create a new lead in lead handling, select a Campaign it will be cloned or created in
- Campaign search scope: select which campaigns will be used to search for a lead that matches an incoming phone number. These will be used in the lead handling settings below.
Opening Hours
Under Opening Hours, configure when the incoming phone number will be open and closed, and when calls should be transferred.
Opening Hours follow the local timezone set on your browser (CET, GMT etc.).
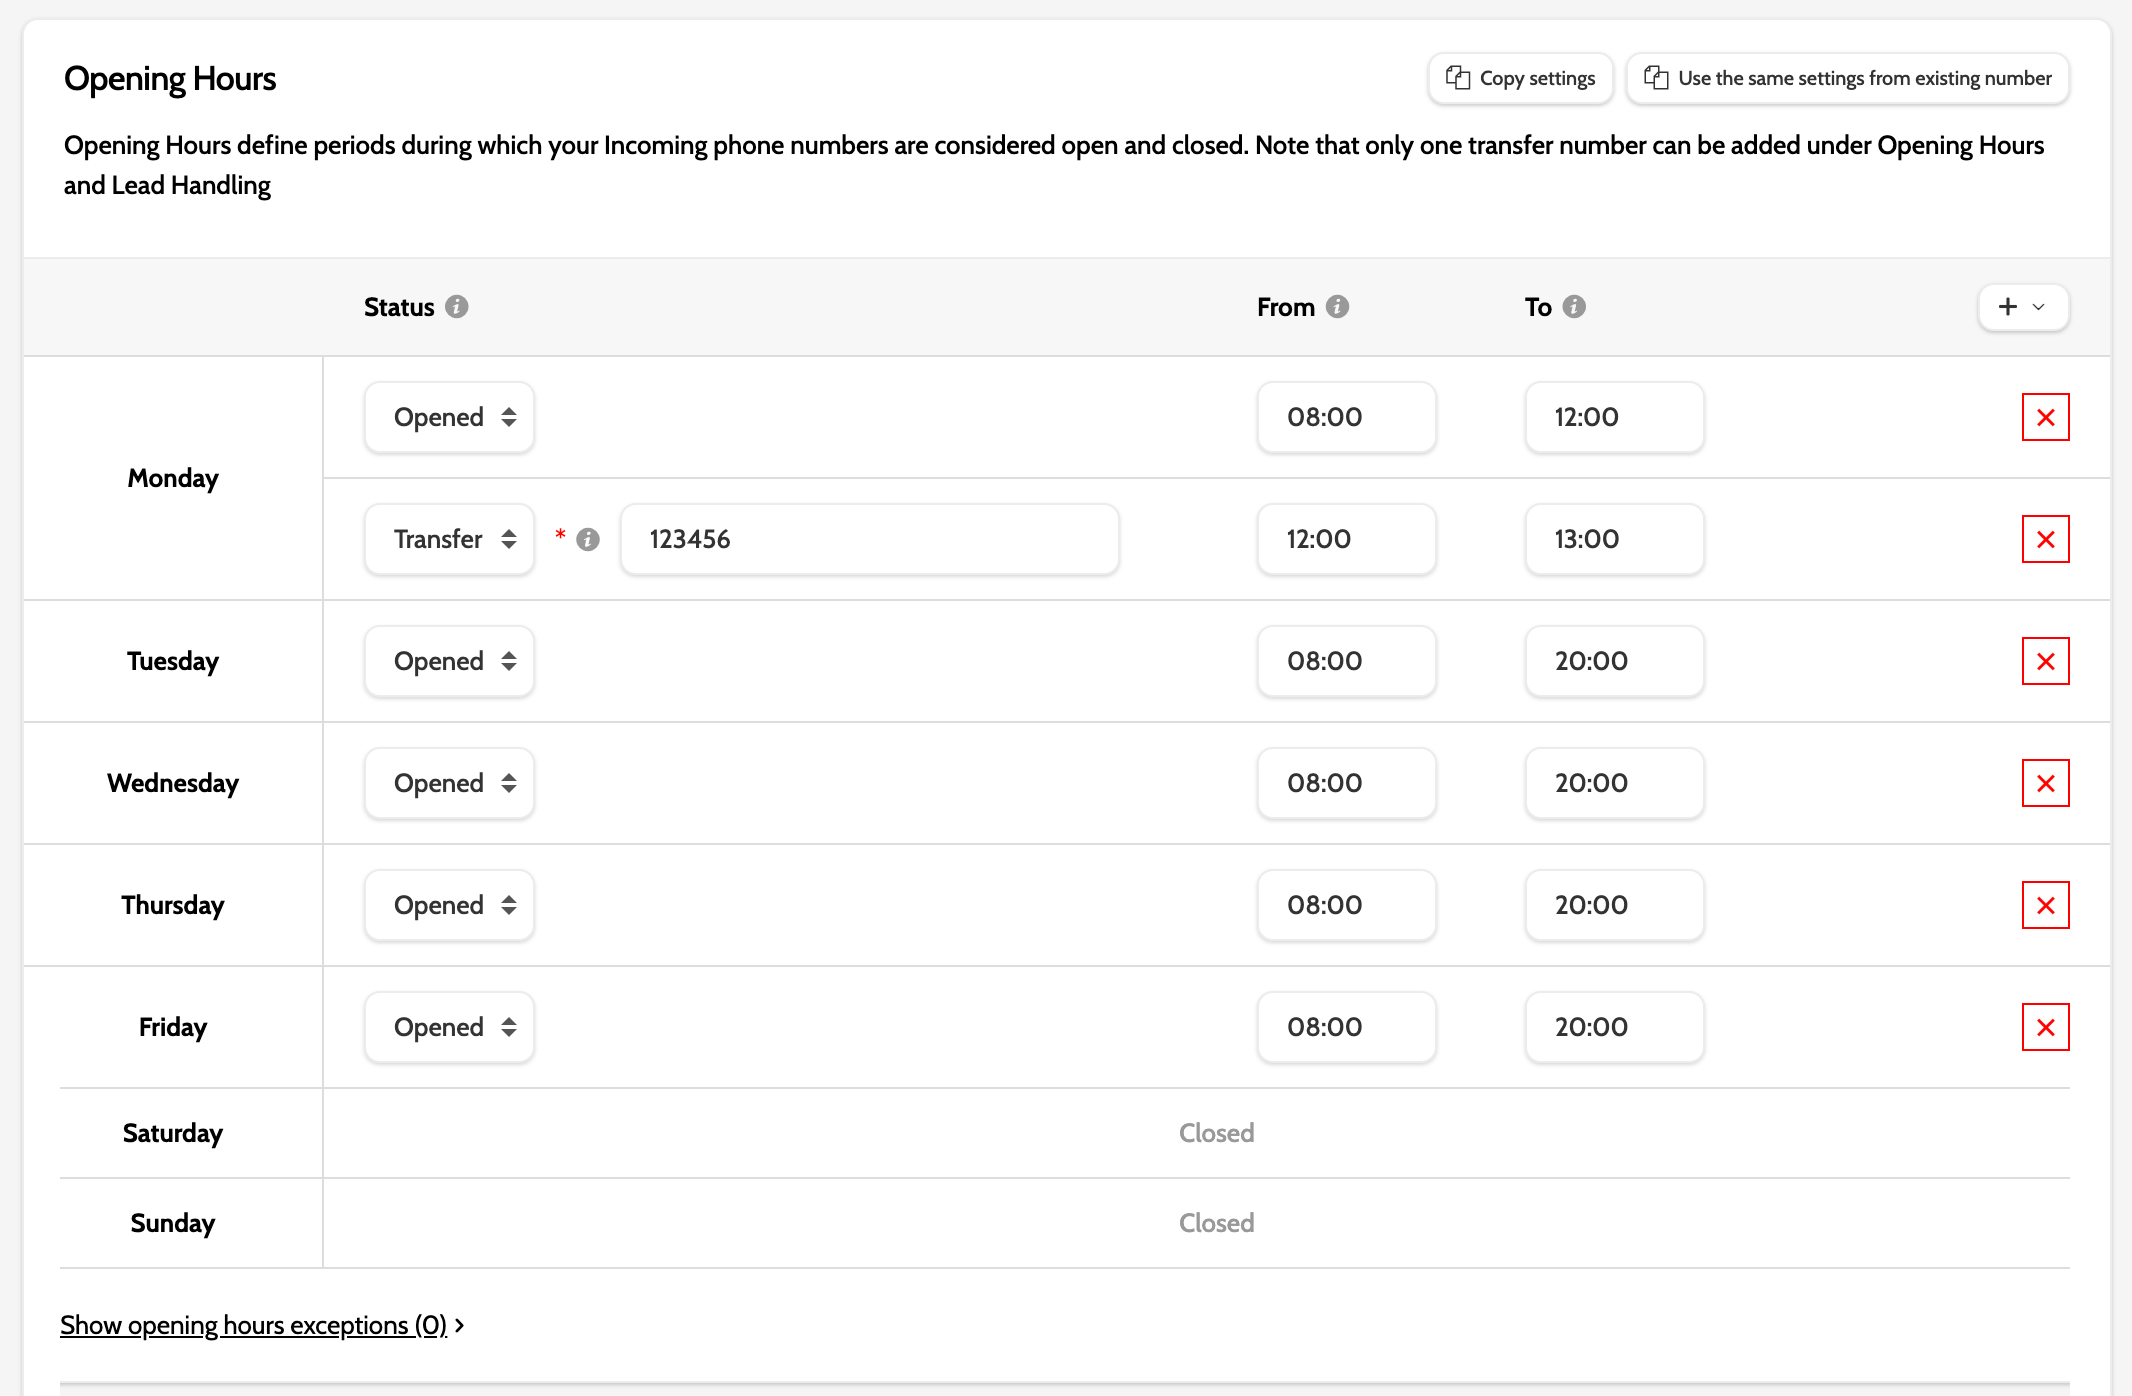
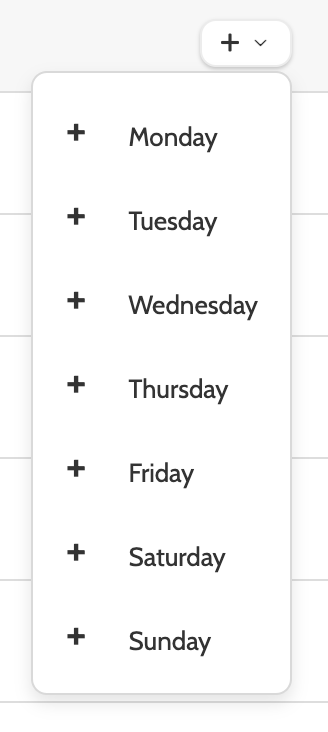
To add more opening hours rules, click the + to the right of the wizard to select a day of the week.
In the Status column, expand the drop-down menu to set the status of the opening hours between Open, Closed, and Transfer.
If you choose to transfer calls, the transfer number can be configured in Lead Handling below.
Enter the correct hours in the From and To columns.

If you need to configure any exceptions to the opening and closing hours, for instance reduced opening hours during public holidays, click Show opening hours exceptions and click the green plus

Enter the settings as above.

Lead Handling
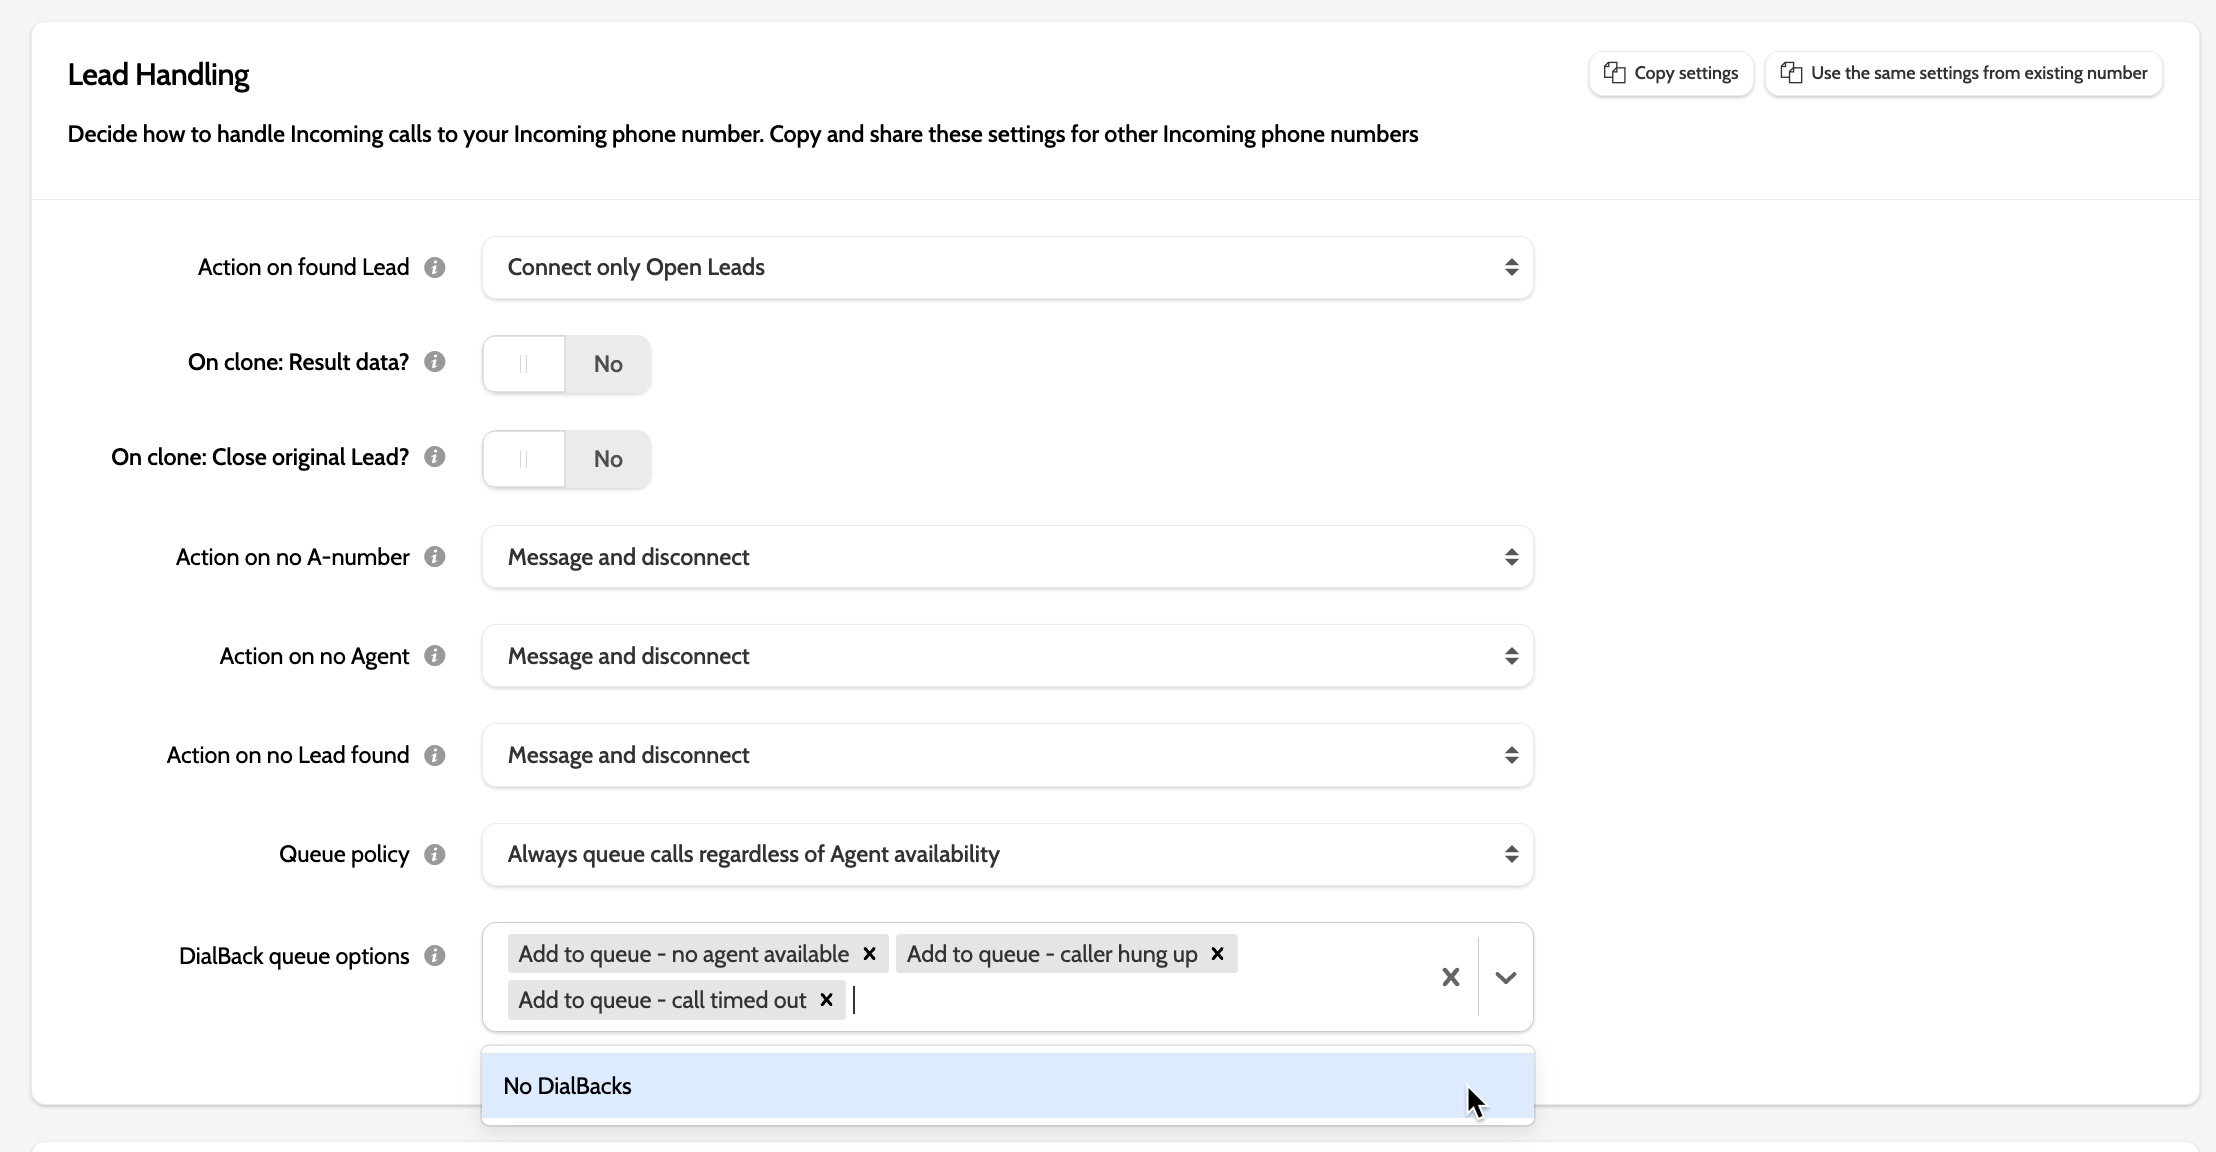
Under Lead Handling, configure how to handle incoming calls:
- Action on found Lead: if the incoming call is matched to an existing lead, choose between the following connection options: Connect only open leads, Connect open and closed leads, Connect open and clone closed leads, and Always clone and connect
- On Clone: Result data?: if you have chosen to clone a lead, choose if you also want to close the result data
- On Clone: Close original Lead?: if you have chosen to clone a lead, choose if you want to keep the original lead, or close it and reduce duplicates
- Action on no A-number: if you receive a call with a hidden number, choose between the following connection options: Message and disconnect, Direct transfer, and Connect as new
- Action on no agent: if there aren't any available agents ready to receive the call, choose between Message and disconnect, or Direct transfer. If you select Message and disconnect, the caller will hear the general fail message chosen under Sound Settings
- Action on no Lead found: if the incoming phone number is not matched to any registered leads, choose between Message and disconnect, Direct transfer, and Connect as new
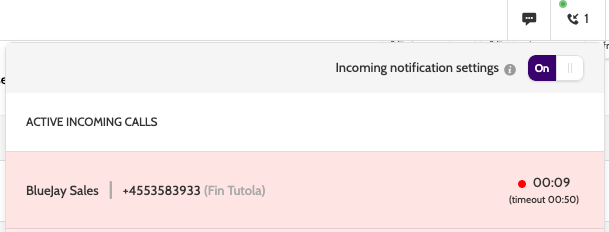
- Queue policy: decide how incoming calls to this number are queued. If an incoming call is received when an agent is not in the contact page with an active agent line, the call will appear in incoming notifications in the top bar:
- Dialback queue options: for unanswered incoming calls, decide which should be placed in the Dialback queue, to be prioritised and called as soon as an agent is available.
Click Copy Settings to copy the Lead Handling settings from other incoming phone numbers.
Click Share Settings to share the Lead Handling settings to other incoming phone numbers.
Note! If you choose to transfer a call after timeout, then you have to disable DialBack for Timeout calls. Reach out to Support to make sure this setting is disabled.
How is a lead matched with an Incoming call?
When you receive an incoming call, Outbound will check to see if there are any leads with that phone number in the system.
If multiple leads are found with the same phone number, for example cloned leads in several different campaigns, then Outbound will select the lead that has been most recently called: the campaign this lead belongs to will be displayed on the contact page.
If the incoming number is not matched to a lead in the system, then what happens depends on which setting you choose in Action on no Lead found.
- Connect as new will connect the lead to the agent. The agent can then save the details as new lead
- Direct transfer will transfer the call to number specified in the field for this (there's a field to specify which number)
- Message and disconnect will play "General fail" message and disconnect the call.
Wait Settings
Under Wait Settings, configure the sounds that leads will hear while waiting to be connected to an agent in the queue (mandatory fields are marked with a red asterisk):
- Connecting sound: the sound the lead will hear when being connected to an agent
- Wait music: wait music will play for the number of seconds set in the Loop sound interval, followed by the loop sound (if selected), and then resume until the call is answered or times out
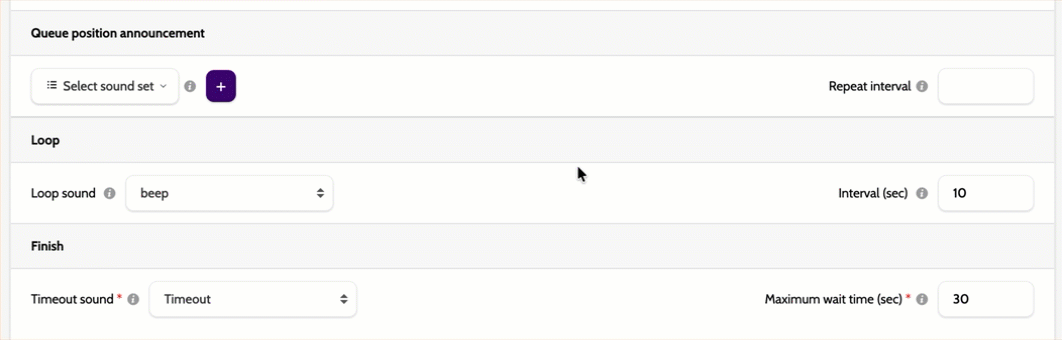
- Queue position announcement: Select messages to inform the lead where they are in the call queue. Choose pre-defined messages from 7 different languages or upload your own
- Loop sound: the sound the lead will hear looped while waiting in the queue. This sound should be short, no longer than 3 seconds
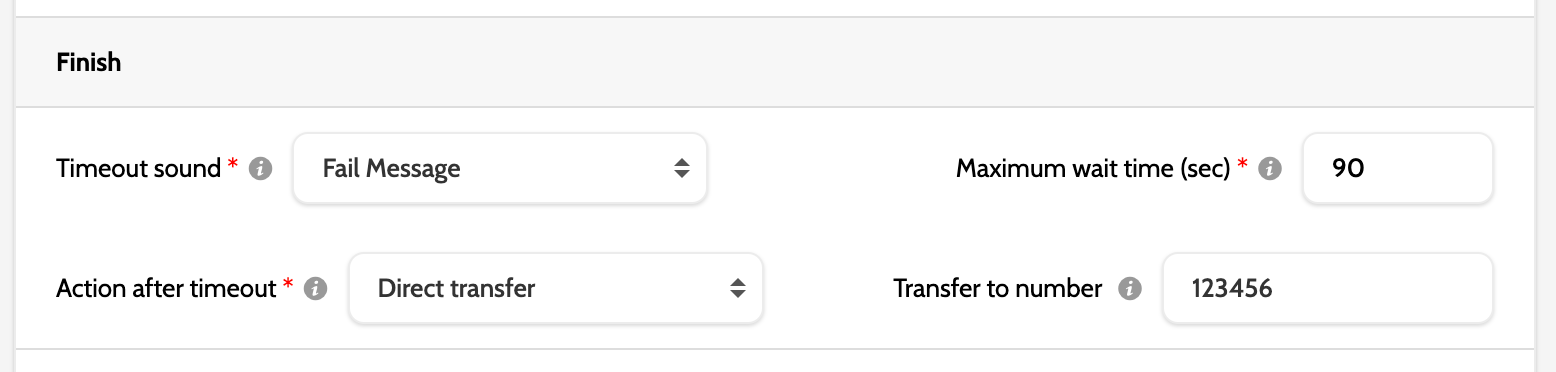
- Timeout sound: if the call doesn't connect and reaches the Maximum wait time, choose what the lead will hear
- Action after timeout: choose what action to take after a call reaches timeout. Select between Message and disconnect, and Direct transfer.
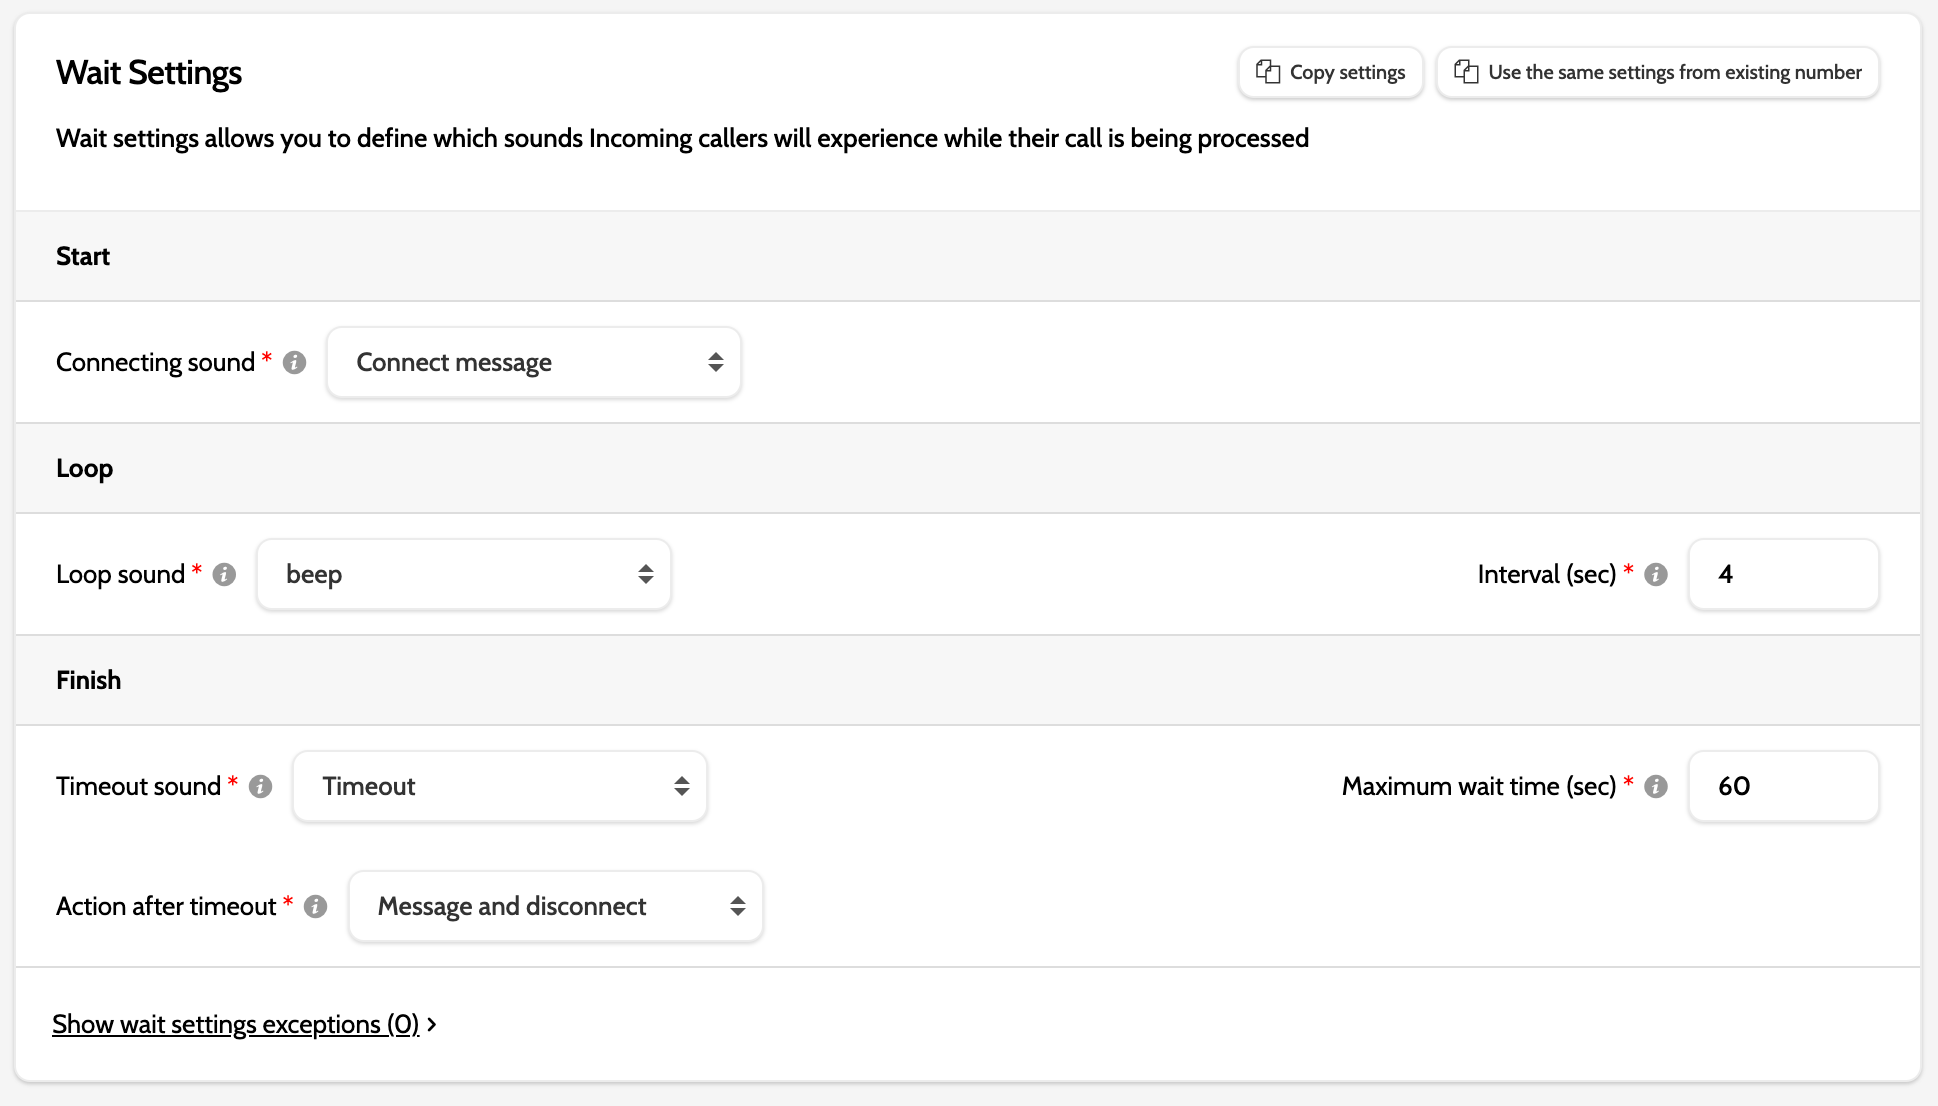
If you need to configure any exceptions to the Wait Settings while the call is in the queue, click Show Wait Settings exceptions and click the green +.
In the image below, after the Lead had waited for the maximum wait time, configured under Finish, the first message will be played after 20 seconds, the second message after 40 seconds, and the third message after 60 seconds.

Setting up queue position announcements
First, decide if you want to use a standard, pre-defined sound set, or upload your own custom announcements for a more personalised user experience.
- If choosing a pre-defined sound set, select the correct language from the drop-down menu
- Enter the number of seconds that should elapse between announcements in the Repeat interval box
- If you are using your own recorded accouncements, first ensure they are uploaded in Audio Management as Sound type > Queue position sound files
- Click the purple plus icon, then the green plus icon
- Expand the drop-down menu and select the accouncement file from the list
- Repeat the process until you have uploaded all your announcement files
- Enter the number of seconds that should elapse between announcements in the Repeat interval box
- Enter a name for your custom set, and remember to click Save!
Please note the maximum number of files is 11: for larger queues, we recommend that announcement file 11 be a generic message to customers that are 11+ in the queue (for example, 'thank you for your patience, we will be will you shortly', 'we are experiencing high volumes of calls, please call back', 'find answers on our website' etc.)
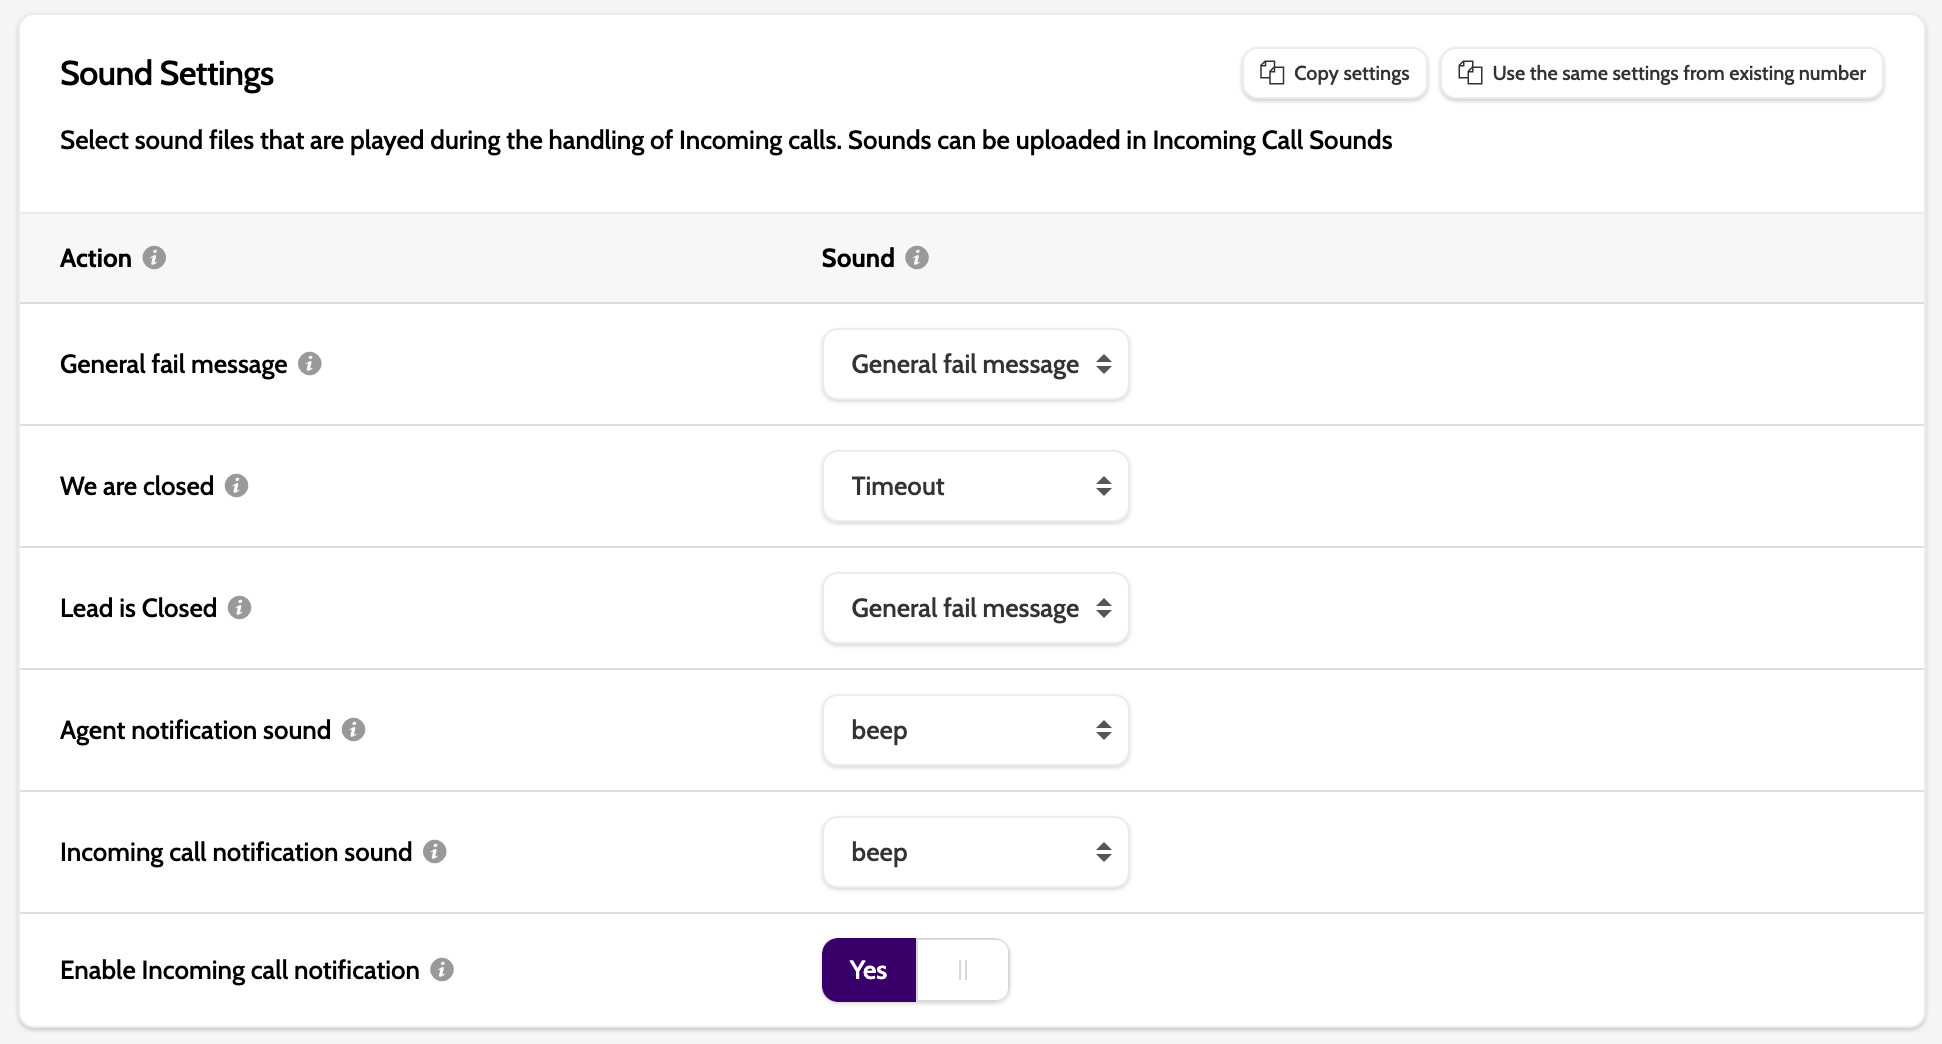
Sound Settings
Under Sound Settings, configure which sounds will be played in a variety of situations:
- General Fail Message will be played whenever the option Message and disconnect is chosen
- We are closed: if the lead calls during closed hours, they will hear this sound
- Lead is closed: if the incoming call is from a lead that has already been closed by an agent, then this sound will be played when the option Action on found Lead is set to Connect only open Leads
- Agent notification sound: this is the browser notification sound that will be played when the next lead an agent is connected to is an incoming call. This setting is configured in Administration > Settings when Incoming Connection Mode is set to Immediately
- Incoming call notification sound: this sound will be played to an agent on the contact page when an incoming call is placed in the queue
- Enable Incoming call notification: choose whether to enable the incoming call notification sound.
When you have finished configuring the settings, click Save changes.