
Quickstart: Number Management
Correctly managing your caller IDs and display number groups can increase contact rate, maintain a better number reputation, and provide a consistent experience for important redials
Before you start
- You must be an admin user to manage numbers
- Make sure you have MFA enabled to upload and manage new numbers.
Step-by-step
1. Manage your Caller IDs
A Caller ID is the number that is shown to a lead. You can use your own or order them through Outbound.
- Go to Administration > Caller IDs to manage your phone numbers
- You’ll see a list of all active and inactive phone numbers in your organisation
- Click the cog (⚙️) next to a number to edit or deactivate it.
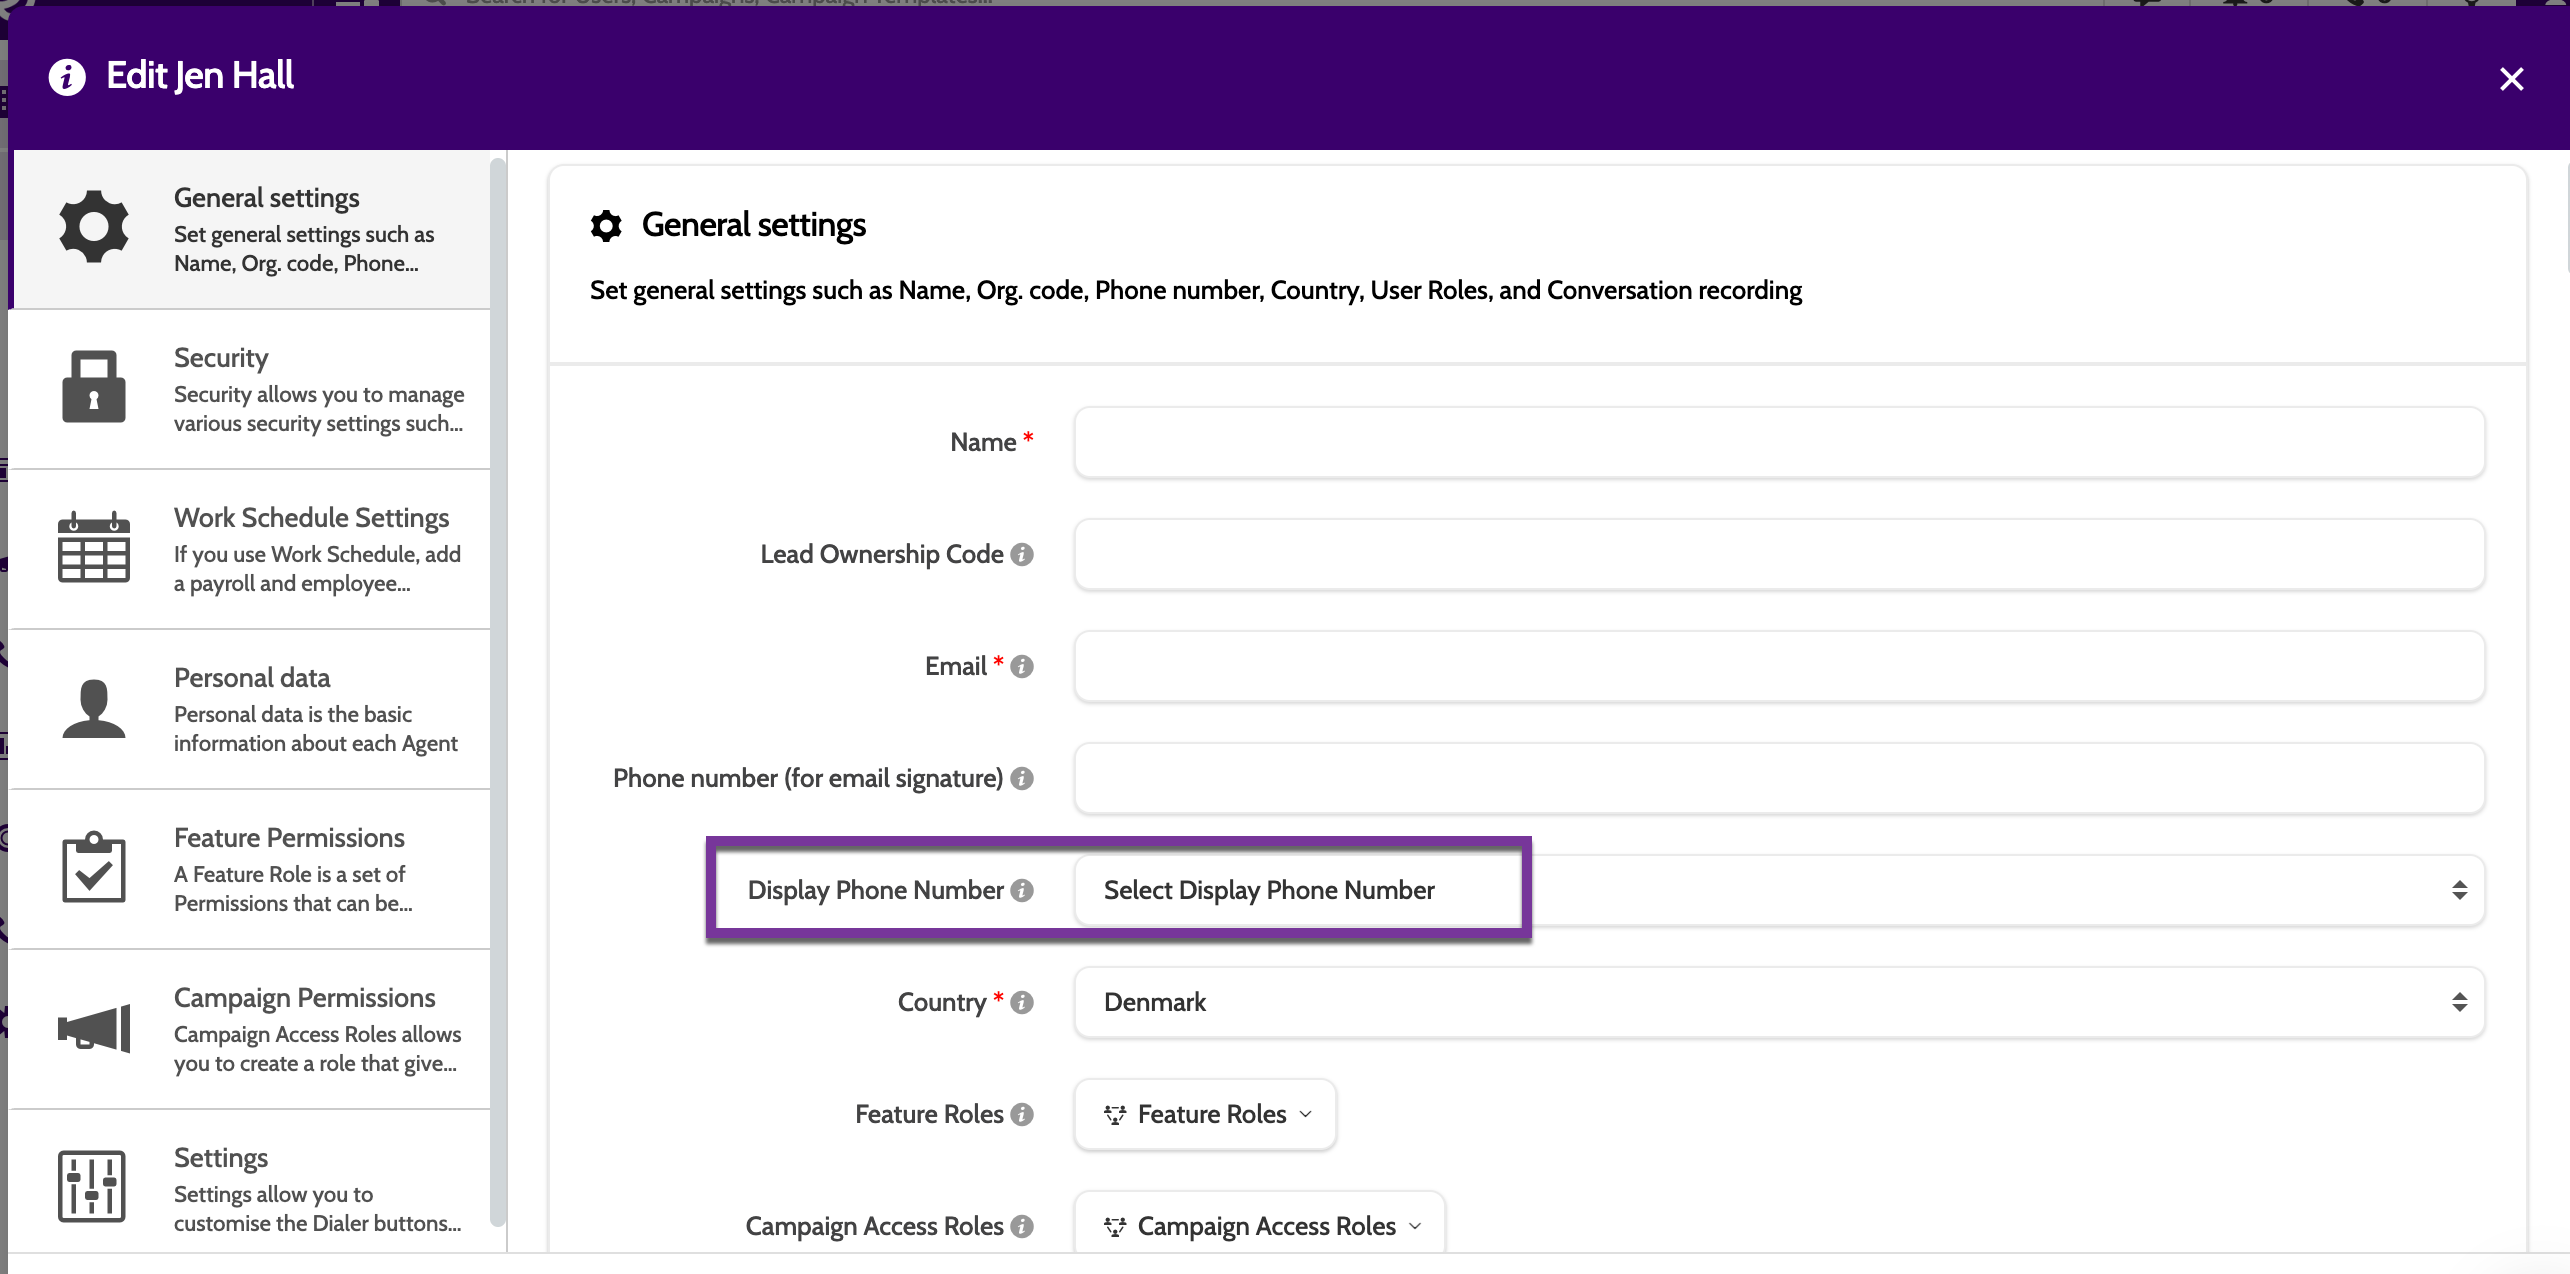
2. Add New Caller IDs
Using your own numbers
- Expand the Options menu and choose Add number or Upload file.
- Add number (one at a time):
- Enter the Phone number with country code
- Select the Project it belongs to
- Add an optional Description to make it easy to identify
- If it should be used for incoming calls, select the number that calls will be forwarded to
- Mark it as Active if you want it usable right away
- Check the declaration box and Save
- Upload file: upload a CSV to import multiple numbers in bulk.
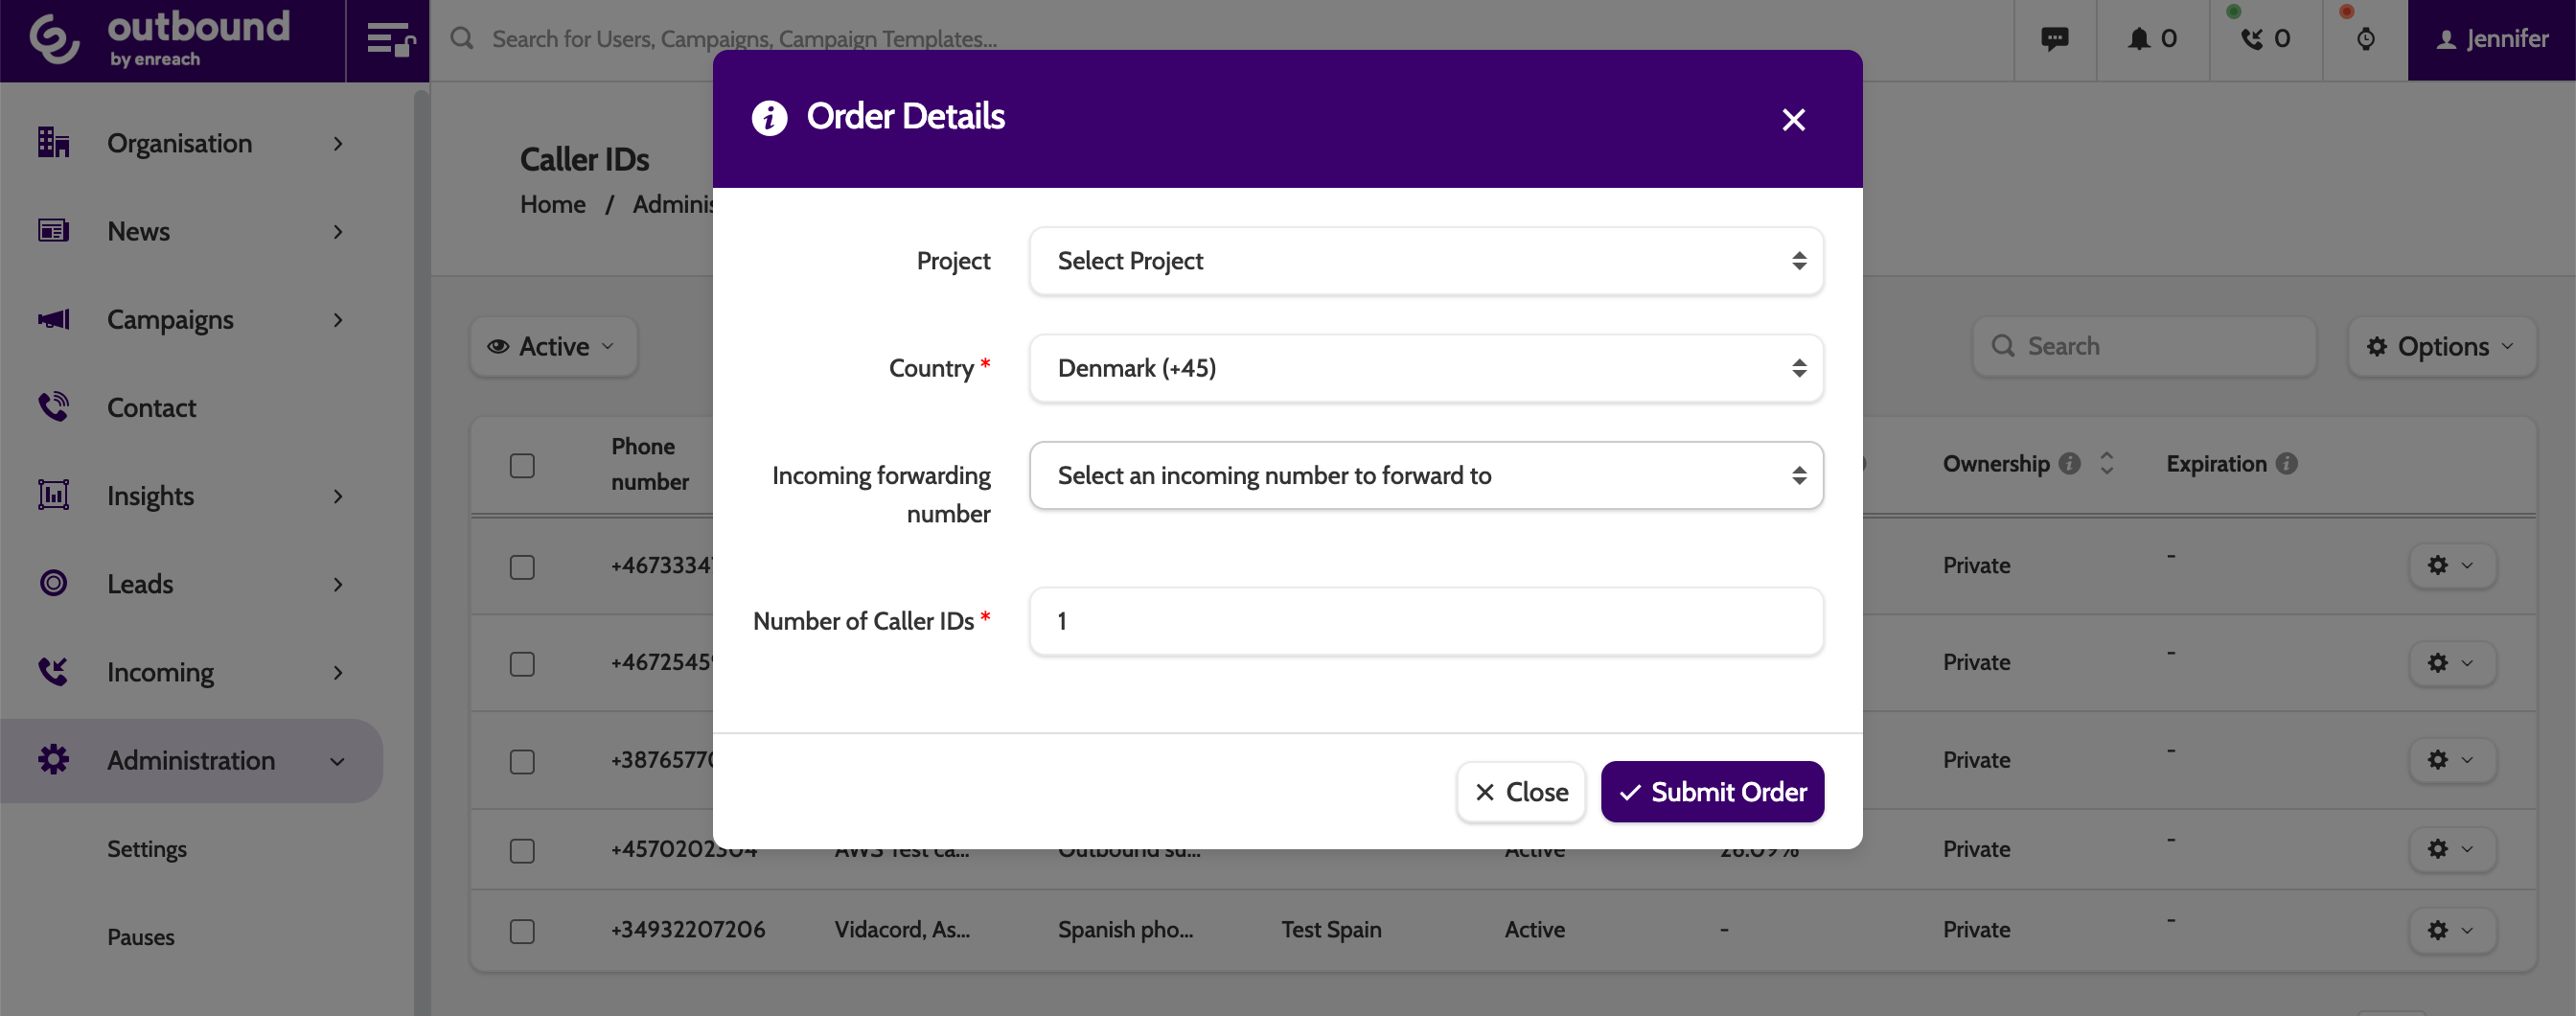
Ordering numbers from Outbound
- Expand the Options menu and choose Order Caller IDs
- Enter the order details (as above) and click Submit
- The new Caller IDs will show in the Caller IDs menu when they are ready to use
- You can check the order status by clicking View Order
Caller IDs ordered from Outbound will be added to your company invoice
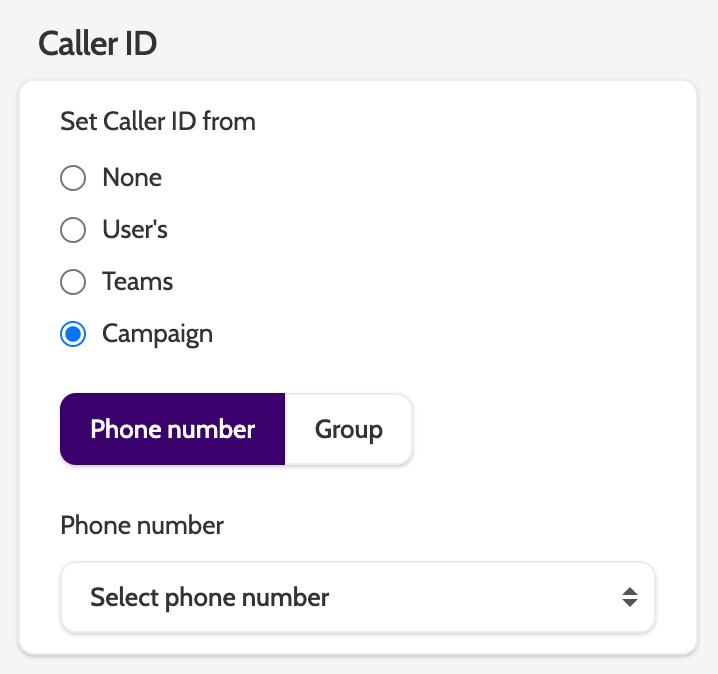
3. Assign Caller IDs
In Campaign Settings > Dialer Settings > Caller ID, choose how Caller IDs should be displayed:
Users will take the number selected in User setting | |
Teams will take the number selected in Teams settings | |
To assign the caller ID to a specific Campaign, toggle to Phone number and select the Caller ID |

4. Set Up Dynamic Display Number Groups
Dynamic Display Numbers let you rotate or customise which Caller ID shows on outbound calls.
- Go to Administration > Dynamic Display Number
- Click New Caller IDs group.
- Under General settings:
- Give the group a name
- Select the Project the group will belong to (a group can belong to only one project)
- Configure Rotation rules:
- Random — numbers rotate randomly.
- Change on Limit Reached — automatically switch number when a usage limit is hit.
- Under Limit Reached Action choose:
- Ignore — reset rotation.
- Hidden number — display a hidden caller ID once the limit is reached.
- Set Usage Limits if using Change on Limit Reached:
- Max amount of displays — how many times each number shows before rotation
- Max amount of days — how long numbers stay in rotation
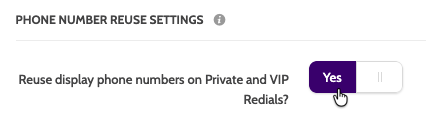
- Phone number reuse settings: decide if numbers should be reused for Private and VIP Redials
- Add numbers to the group (only numbers already uploaded can be added)
- Save when done!
Read more about Dynamic Display Numbers here
Check it’s working
- Uploaded numbers appear in the Caller IDs list and show as Active
- Numbers assigned to campaigns show correctly in the caller display when calling out
- Users/Teams display their assigned number if User/Team Caller ID is set
- Dynamic Display Number groups rotate numbers according to your configured rules.
Troubleshooting essentials
- Numbers not available to assign? Ensure they’re uploaded and marked Active
- Can't upload numbers? Enable MFA in Manage Organisation first
- Campaign still shows wrong Caller ID? Double-check which Caller ID method is selected in Campaign Settings (Campaign/Group/User/Team)
- Dynamic group not rotating as expected? Confirm rotation type and usage limits, then save and test again.
Best practices
Do! ✅
- Use Caller ID Groups per project and rotate via Rotation rules (e.g., Random) to avoid over‑exposing a single number
- Monitor contact rate % in the Caller IDs page; retire or pause under‑performers and add new numbers
- Apply Contact Attempts Filter so later attempts use a different Caller ID, improving recognition and pickup
- Activate Phone number reuse settings (e.g., allow reuse for VIP/Private redials where familiarity helps).
Dont! 🚫
- Don’t rely on one Caller ID for a whole campaign; it tanks contact rate over time
- Don’t keep expired or low‑performing leased numbers active; deactivate or replace.
🎉 You're all set!
You now know how to manage your caller IDs, and the recommended practices to increase the contact rate.
Last updated: 1/29/26, 10:13 AM