
Quickstart: Creating a campaign template
Define the lead data your campaigns use and what agents record during calls—all in one structured template.
Before you start
- In most cases, you must create a campaign template before uploading leads.
- Decide whether you’ll start from a CSV file or a blank template.
Best practice:
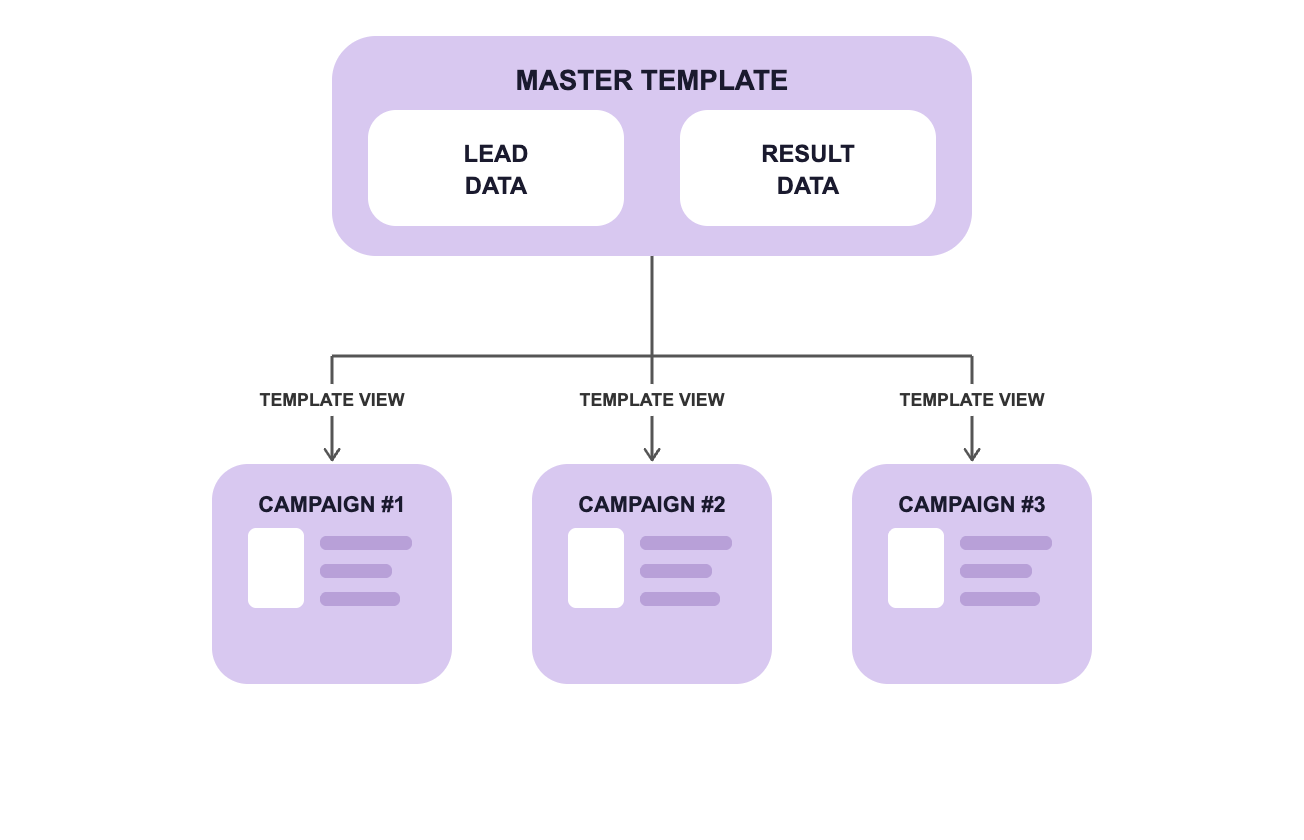
Start with a master template containing all fields your company uses, then create template views—filtered versions containing only the fields needed for specific campaigns.
Some things to note:
- Views can’t change the underlying data model or dependencies—only which fields are shown.
- Changes to the master template apply to all its views (good for consistency, but plan changes carefully).
- If campaigns need different outcomes/logic, create a separate template instead of a view.
Step-by-step
1. Understand the Campaign Template Structure
A campaign template is made up of two parts:
- Master data fields – the core information you store about each lead (e.g., name, phone number, address).
- Result data fields – information agents record during or after a call (e.g., call result, notes, bookings, products sold).
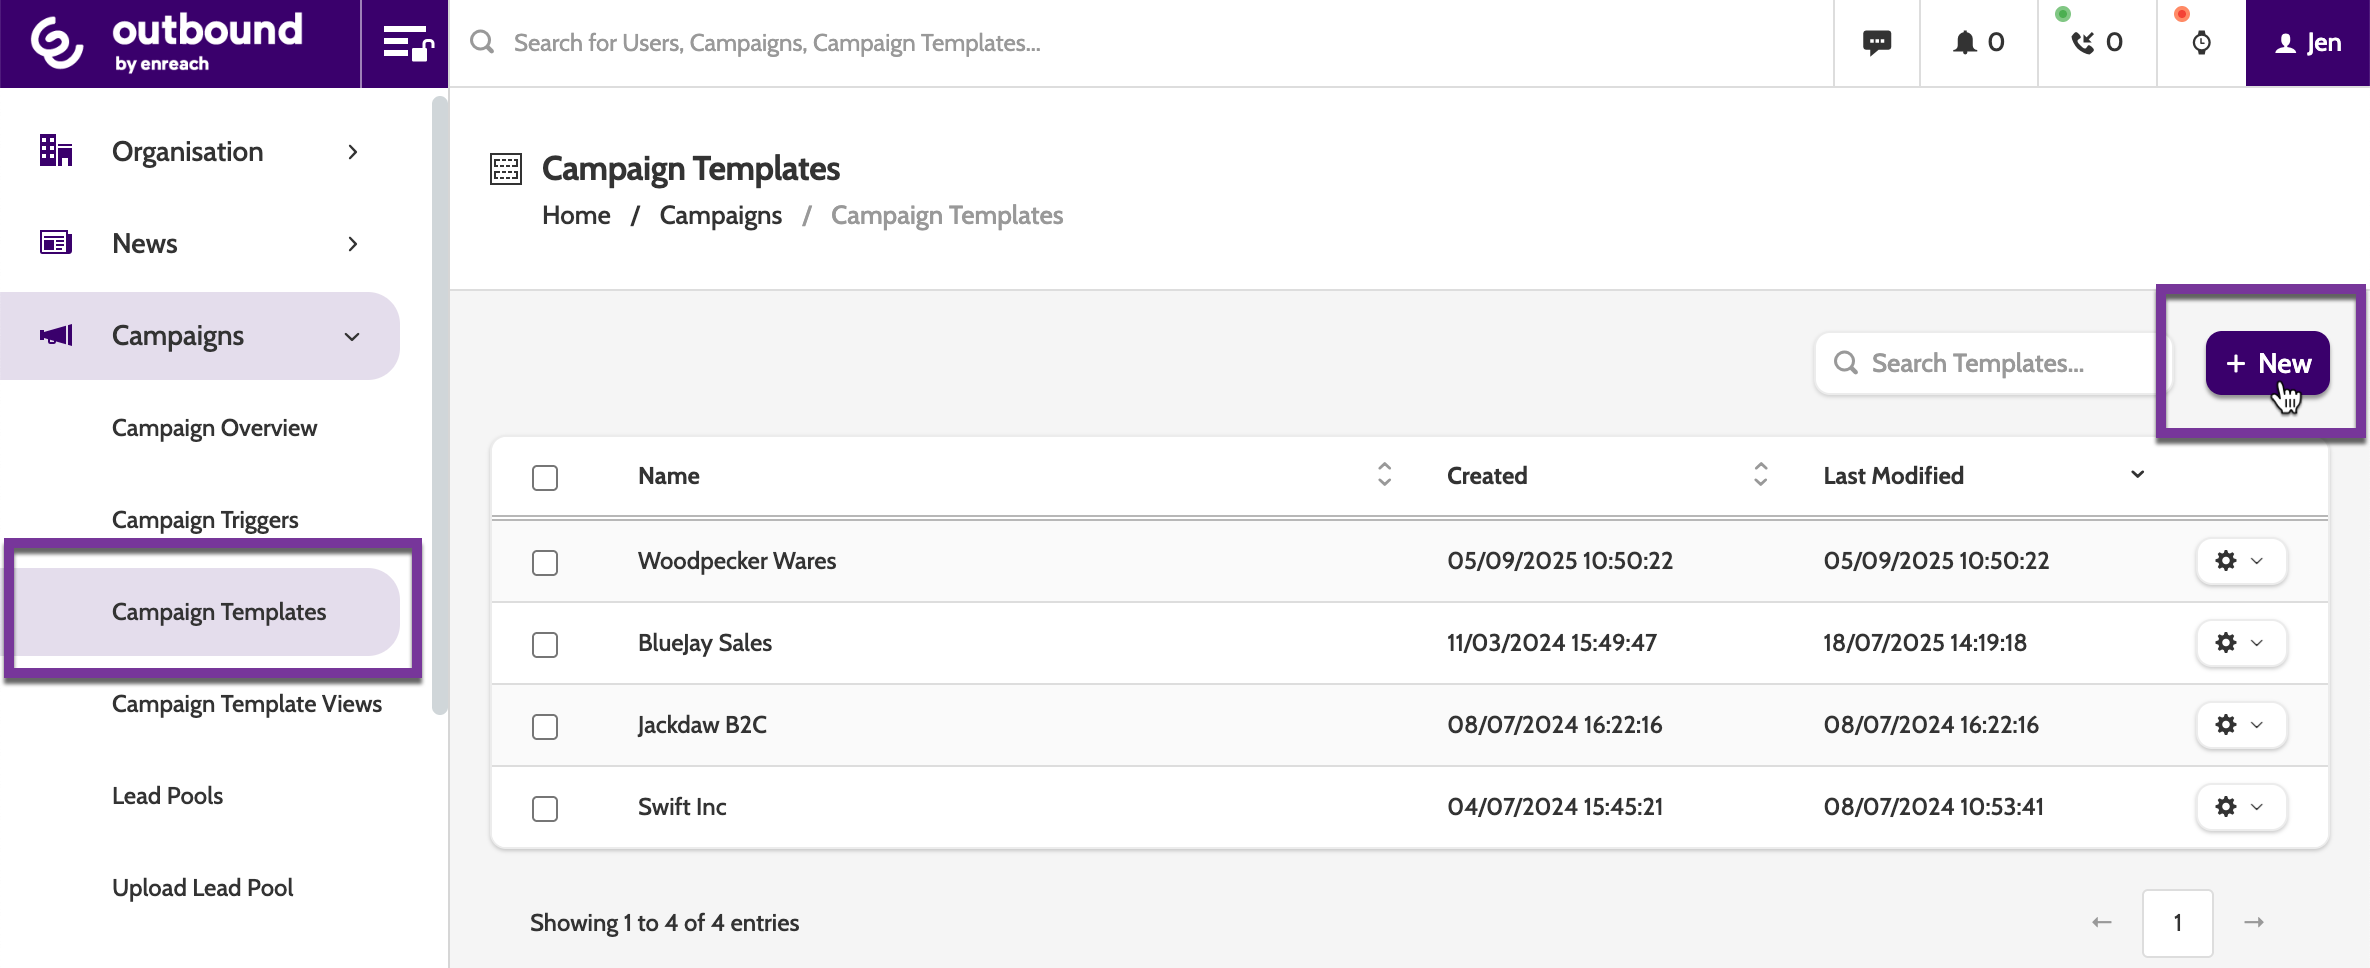
2. Create a Campaign Template
Navigate to Campaigns > Campaign Templates and click New.
There are two ways to create a new template:
- Upload a lead file (CSV)
- Column headers (e.g., name, phone number) become master data fields automatically.
- You’ll still need to create result data fields.
- Start Blank
- Build every field from scratch.
To add fields:
- Click New
- Enter the field name
- Select the appropriate data type
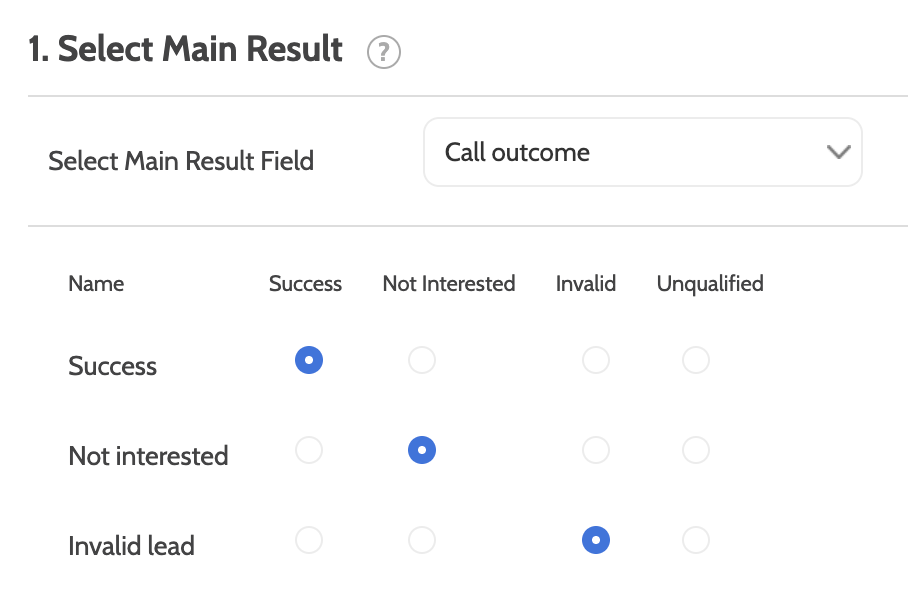
3. Add Mandatory Call Outcome Field
Every lead template must include a Picklist as the main result field.
After adding it:
- Map each picklist option to one of the four required Outbound outcomes:
Success, Not Interested, Invalid, Unqualified.
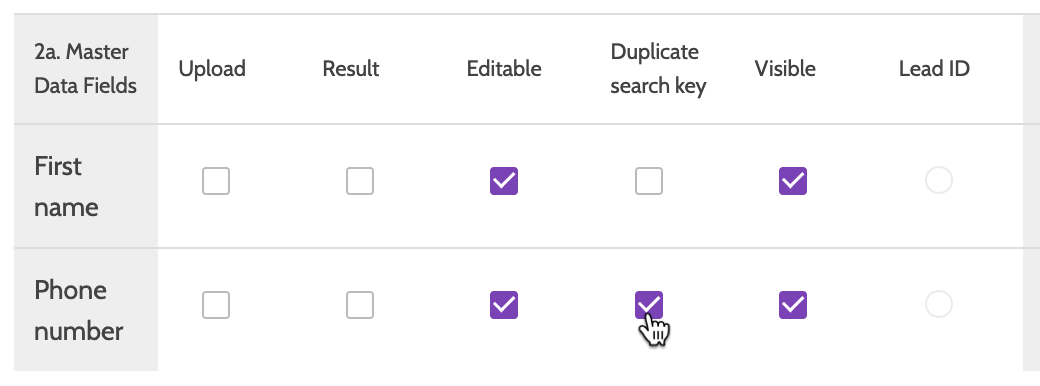
4. Set Duplication Rules
Choose the field used for checking duplicate leads.
Recommendation: Use phone number.
5. Enhance Your Template (Optional)
You can customise lead templates further by adding:
- A calendar to book meetings
- Clickable URLs (e.g., link to a CRM profile)
- A shopping basket of products to sell
- Field rules to control when certain fields are shown.
6. Create a Template View
To tailor your template for a specific campaign:
- Go to Campaign Template Views
- Click the purple plus icon
- Select your master template
- Give the view a name and click Create
- Choose which master data fields and result fields to include
- Click Save.
Check it’s working
- Your new template and views appear in the Campaign Templates list.
- Agents will see only the fields included in the selected view.
- When creating or editing a campaign, your template and view are available under Edit Campaign → Campaign Information.
Troubleshooting essentials
- If fields are missing in a campaign: check that they’re included in the template view.
- If agents can’t record results: confirm the Main Result Picklist exists and all outcomes are mapped.
- If duplicate leads are slipping through: verify the correct deduplication field (usually phone number) is selected.
Last updated: 6/9/26, 12:29 PM